10 Security and Privacy Tips

1. Disable "Open safe files after downloading"
If you do one thing this article suggests, this should be it. Unticking just one checkbox will protect you from most of the few dangerous Mac exploits around on the internet.
In Safari, choose Preferences from the Safari menu and then click on the General tab. Near the bottom, un-check the checkbox that says "Open safe files after downloading". There. Done.
2. Disable automatic login
Even if you only have one user on your Mac, requiring a username and password when starting up is great for security, especially if you have a laptop that can more be easily lost or stolen. You can do this from the Security section of System Preferences, by checking the checkbox "Disable automatic login".
While this isn't going to stop someone intent on stealing your personal data, regular thieves are more likely to just wipe the hard drive rather than going through all your personal stuff first.
3. Lock screen when away
There are a couple of ways to make your Mac require a password when you leave it. The easiest way is to set "Require password after sleep or screen saver begins" in the Security section of System Preferences. Here, you can also set a time limit so a password isn't required right away, but only after 15 minutes for example.
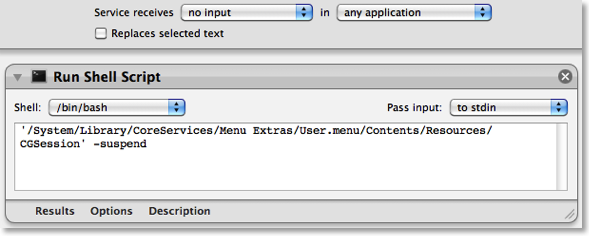
If you would prefer a keyboard shortcut to lock the screen, you can create this yourself. Open up Automator (in the Applications folder) and choose a Service template. From the library choose "Run Shell Script" and drag it across to the workflow area. In the text box paste the following command:
’/System/Library/CoreServices/Menu Extras/User.menu/Contents/Resources/CGSession' -suspend
Finally, change the "text" drop-down menu above the workflow to "no input" and then save you workflow as "Lock Screen". To add the keyboard shortcut, go to the Keyboard section of System Preferences and click the Keyboard shortcuts tab. Select Services from the list on the left, then scroll down to the bottom of the list on the right to find "Lock Screen". Double-click on the area to the right "Lock Screen", then press the keyboard shortcut you want. I used Command-Control-L.
4. Use 1Password to create and store internet passwords
One of the problems with having lots of accounts on the internet is that for them to really be secure, they should all have a different password. For example, if you use the same password for your bank account, your email account and some shady disreputable website, you are asking for trouble.
My solution to this is to use an application called 1Password to create and remember all my passwords for me. The only three passwords that I remember myself are my email password, my bank password and a master password for 1Password. All the others - for Facebook, reddit, Amazon, etc - are randomly generated 20 character strings that are created and remembered for me by 1Password. When I go to one of those web sites, 1Password simply prompts me for my master password, then fills in the rest for me.
Some of this functionality can be replicated for free using Keychain Access, but the real benefit of 1Password is its automation, and the fact that it works in Safari, Firefox and on your iPhone so you don't have to save your passwords separately for each.
5. Turn on the firewall
Mac OS X comes with a built in firewall, but it is actually turned off by default. You can turn it on in the Security section of System Preferences. The Mac OS X firewall is really simple to set up - just click start to turn it on. Some applications will have trouble working through the firewall, instant messengers for example. If you find you start having connection problems with an application, just add it to the allowed list in the firewall preferences.
6. Little Snitch
While a Firewall protects your computer from unwanted connections from the outside, Little Snitch does the opposite and blocks your private data from being sent out. If you start an application and it tries to send some data out to a server on the Internet, Little Snitch will inform you and ask if you want to allow it. Read more over at the Little Snitch site.
7. Encrypt and hide your private files
It isn't entirely obvious how to password protect files or folders in Mac OS X but there are a couple of ways.
If you just want to protect a single iWork or PDF document, you can do this from within the specific iWork application or from within Preview. In Pages, Keynote and Numbers '09 you can choose "Require password to open" from the Document section of the Inspector window. In Preview, when choosing "Save As.." on a PDF there is a checkbox to encrypt.
If you want to password anything else, you have to password protect an entire folder. The way this is done is using encrypted disk images. Once created these appear as a single file on your hard drive with a dmg extension. When you double-click on one, it will ask you for the password. If you enter the password correctly, it will mount a disk image on your desktop. So while unlocked, the disk image is just like a temporary folder on your desktop. You can copy files to it and delete files from it, and as soon as you eject it, the contents will be password protected again. Here’s a detailed article about how to set up a disk image.
8. Use FileVault
Personally, I don't use this option, but for those who want to be ultra-secure it is an amazing feature. It is similar to creating an encrypted disk image for some files, but instead it does this for your entire user folder. It is much more straightforward and transparent than setting up an encrypted disk image too. Just turn it on the Security section of System Preferences, and all your files will be unencrypted and encrypted on the fly when you log in and out of your computer.
I would say this is probably overkill for most users. If you have an encrypted disk image for your most sensitive files, then it is a bit redundant to then encrypt your entire user folder. It also causes some problems concerning Time Machine backups, and also huge problems if you happen to forget the password…
9. Secure Empty Trash
More and more people now realise that when you delete something off your hard drive, it doesn't actually get physically removed from the disk. All references to it are gone, but it stays there until something else is written over it. For private documents this is a bad situation because someone with some special software can recover you supposedly deleted files.
To prevent this, you can use the "Secure Empty Trash…" option which is in the Finder menu. This takes longer than the normal trash emptying, because your computer is actually writing nonsense data over the top of your deleted files.
10. Securely erase an entire hard disk
If you have an old Mac you are thinking of selling or throwing away, it might be a good idea to securely erase all the data from it. To do this you need to start up from the installer CD that came with your Mac by inserting it and holding the C key while the computer starts up. In the installer, choose Disk Utility from the menu bar.
If the hard drive you want to erase is not your main hard drive, you can skip starting up from the install disk and just open Disk Utility from the Utilities folder inside the Applications folder.
In Disk Utility, choose the hard disk from the list on the left, click on the Erase tab, and then click on the Security Options button. Now you have four levels of security to choose from. Each higher level of security takes longer to erase, so the 35-pass erase will take upwards of 24 hours and is only for the truly paranoid.
Of course, if you are throwing away the Mac or even just the hard drive, nothing works better and is quite as satisfying than the physical destruction option. Just take the hard drive out of the Mac and completely destroy it with a hammer.
A place to share your GeekTool setups
I've mentioned GeekTool a couple of times before, and it has recently been updated to version 3. The best thing about the update is how much simpler the interface is. Before the interface was a bit intimidating, but now it is much easier to use.
For those who don’t know, GeekTool is a preference pane that allows you to display different kinds of information on your desktop. These bits of information are called Geeklets, and they can be text, images, files, and the output of shell commands. Some of the most common things to use it for are displaying to do lists, today’s iCal events, the date, the current iTunes song and unread mail.
The latest version now allows you to save your Geeklets and share them with each other, so I’ve created a site just for that. It allows you to submit your Geeklets and vote on others to see which are most popular. If you are new to this, it also has a page for getting started with GeekTool.
Here are a few tips for using GeekTool.
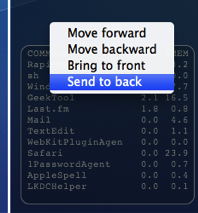
1. Set stacking order
If you have overlapping Geeklets, you might find that the wrong one is on top. Just right-click on the Geeklet and change the order by choosing “Send to back” or one of the other options.
2. Don’t set refresh to zero
By default, GeekTool sets the refresh time to 0, which means it continuously refreshes as quick as it can. It is best to avoid this as it can take a considerable toll on your system, hogging resources and slowing things down. For things that really have to be updated very regularly, consider a refresh time of 5 or 10 seconds instead.
3. Group your Geeklets
By putting your Geeklets into separate groups, you can quickly and easily enable and disable them based on their grouping. Note that Geeklets can be in multiple groups - as long as one of the is enabled, the Geeklet will be shown.
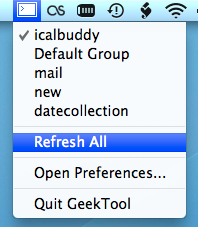
4. Use the menubar item
GeekTool now has a menubar item that you can enable from the preference pane. From here you can enable and disable groups, force a refresh on all Geeklets, disable GeekTool, and access the preference pane.
5. Check out other people’s Geeklets
Check out the Geeklets other people have posted to get some inspiration for your desktop. Vote up your favourites, and share your creations too.
Delete large files from a Time Machine Backup
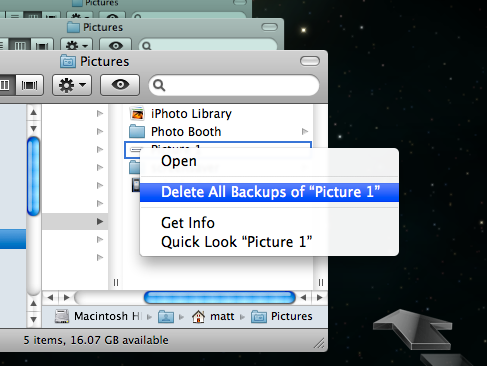
If you are looking to reduce the size of your Time Machine backup, it's quite easy to go through you backups and remove files.
Just enter Time Machine, locate the file you want to delete, right-click on it and choose "Delete All Backups..." But which files do you delete?
You want to get rid of large files, but not those that are important. The best way to do this is to use an application called GrandPerspective. Pierce Wetter has created a modified version of this application specifically for Time Machine backups.
It searches through your backups, and finds large files that have only been backed up once. These will be the files that either constantly change by small amounts or were only on your Mac for a very short time.
It then produces a nice "map" of your backup, so you can easily see which files are taking up the most space. Hold you mouse over one of large boxes, and make a note of the backup date and location, shown at the bottom. Then just enter Time Machine, go to the date, and remove the backup as usual.
If you find that a lot of the files you are removing are in the same location, you might want to exclude that folder from the Time Machine backup. To do this, just go to the Time Machine section of System Preferences, click the Options button and then drag the folder into the list.
Fix "Copy Address" in Snow Leopard Mail
Here’s a tip I just read over at the brilliant Hawk Wings blog.
You can copy a person's email address in Mail by clicking on their name and choosing "Copy Address from the contextual menu. For some reason, Snow Leopard will copy the email address in angle brackets, instead of just the address. So when pasting you will get <matt@macosxtips.co.uk> instead of just matt@macosxtips.co.uk.
This might be useful for some people, but I really prefer the previous behaviour. To change the behaviour of Mail back to the old way without angle brackets, just use the following Terminal command:
defaults write com.apple.mail AddressesIncludeNameOnPasteboard -bool NO
To run it, open up Terminal located in Applications/Utilities. Paste in the line, then hit return. Quit Mail if it is open, and now when you next open it you won't get any angle brackets when copying addresses.
Top 15 Terminal Commands for Hidden Settings in Snow Leopard
Every time Apple brings out a new version of OS X, we compile a list of our favourite Terminal commands for enabling hidden features and changing hidden settings (here are the lists for Tiger and Leopard).
For those who are new to Terminal Commands, here's a quick run down of how to use them. Don't worry, it's really easy. Start by opening up Terminal, located in the Utilities folder in the Applications folder. In the window that appears, paste in one of the lines provided below, and then hit Return. For the changes to take effect, you need to restart the application concerned. For applications like the Dock or Finder, it is easiest to just type killall Dock or killall Finder into the Terminal to restart them. To reverse the changes, you just need to change the last word of the command and run it again. If the last word is YES, change it to NO, change 1 to 0, and change TRUE to FALSE and vice versa for all.
1. Folder previews in Quick Look
This is my favourite hidden feature in Snow Leopard. When enabled, using Quick Look (hit the space bar) on a folder will show you a preview of the folder's contents inside a translucent folder icon. The previews of the files inside the folder also cycle through so you can see all of them. Just use the following command:
<code>defaults write com.apple.finder QLEnableXRayFolders 1</code>
You will need to restart the Finder, either by typing killall Finder into the Terminal or by Control-Option-clicking on the Finder in the Dock and choosing Relaunch.
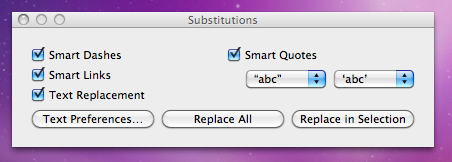
2. Globally enable Text Substitutions
You may have realised that the new text substitutions feature in Snow Leopard isn't enabled in all applications by default, most noticeably in Safari. To enable it , you need to right-click on a text box and choose Substitutions then Show Substitutions. To globally enable text substitutions, use the following three commands one at a time. The first one will enable substitutions, while the second will enable dash replacement and the third will enable spell checking.
defaults write -g WebAutomaticTextReplacementEnabled -bool true
defaults write -g WebAutomaticDashSubstitutionEnabled -bool true
defaults write -g WebContinuousSpellCheckingEnabled -bool true
If you decide there are some specific applications where you want to disable these again, you can do it in the normal way. As always you will need to restart each application for the changes to take effect.
3. Bring back AppleScript Studio palette
As of Snow Leopard, AppleScript Studio has be deprecated in favour of AppleScriptObjC. You can still work on AppleScript Studio projects, but you can't create new ones, and the AppleScript Studio palette in Interface Builder is gone. To bring it back, use the following command:
defaults write com.apple.InterfaceBuilder3 IBEnableAppleScriptStudioSupport -bool YES
4. Disable "focus follows mouse" in Terminal
In Leopard there was a Terminal command to make the Terminal's window focus change with mouse movement. If you had previously enabled this, you will find things don't work quite right in Snow Leopard when you use Command-Tab to switch between applications in different spaces. To fix this, you will need to disable the focus follows mouse behaviour using the following command:
defaults write com.apple.Terminal FocusFollowsMouse -string NO
5. Force Dictionary to only use one window
If you aren't a fan of using Command-Control-D to quickly look up definitions, you might use the "Look up in Dictionary" contextual menu item or Services menu item. In Snow Leopard, each word you look up using these methods opens in a new Dictionary window, which gets a bit annoying. To make each word you look up open in the same window, just use the following command:
defaults write com.apple.Dictionary ProhibitNewWindowForRequest -bool TRUE
6. Change the behaviour of the green zoom button in iTunes
With the release of iTunes 9, Apple messed around a bit with the behaviour of the green zoom button in iTunes. Things are back to normal as of iTunes 9.01, but briefly the green button maximised the window instead of switching to the mini-player. If you liked the temporary change, you can bring it back using the following command:
defaults write com.apple.iTunes zoom-to-window -bool YES
Of course, you can always get the alternative behaviour by holding the Option key and clicking in the green button.

7. Debug menu in Address Book
The debug menu has been available in Address Book for some time, but there are some new additions in Snow Leopard. If you don't already have it enabled, the command is:
defaults write com.apple.AddressBook ABShowDebugMenu -bool true
Restart Address Book, and then click Debug in the menu bar to see the new options. You can enable reflections under contacts pictures, get to the "People Picker Panel" and enable a debug panel called "Ye Olde Debug Settings”.
8. Autoplay movies in QuickTime X
One of the weird things about the new version of QuickTime is that it has no Preferences. Luckily you can still change things using the Terminal. To make a movie automatically start playing when you open it, use the following command:
defaults write com.apple.QuickTimePlayerX MGPlayMovieOnOpen 1
9. Keep QuickTime in full screen when switching applications
If you are watching a movie in full screen in QuickTime and you use Command-Tab to switch to another application then the movie will automatically exit full screen. To make it stay full screen in the background, use the following command:
defaults write com.apple.QuickTimePlayerX MGFullScreenExitOnAppSwitch 0
10. Disable Rounded corners in QuickTime
If the slightly rounded corners of movies in QuickTime bug you, use the following command to disable them:
defaults write com.apple.QuickTimePlayerX MGCinematicWindowDebugForceNoRoundedCorners 1
11. Always or Never show titlebar and Controller in QuickTime
The following two commands either permanently enable or disable the titlebar and controller that pop up when you mouse over a movie in QuickTime:
defaults write com.apple.QuickTimePlayerX MGUIVisibilityNeverAutoshow 1
defaults write com.apple.QuickTimePlayerX MGUIVisibilityNeverAutohide 1
12. Automatically show closed captioning and subtitles on opening
This turns on subtitles and closed captioning automatically when you open a movie that supports them.
defaults write com.apple.QuickTimePlayerX MGEnableCCAndSubtitlesOnOpen 1
13. Make list view stacks work like grid view Stacks
This command slightly changes the behaviour in Stacks in list view. Once enabled, they act more like grid view Stacks, but with a single list of files and icons on the left. The main difference is when "drilling-down" through folders within the Stack.
defaults write com.apple.dock use-new-list-stack -bool YES
You will need to restart the Dock for changes to take effect. The easiest way is to use killall Dock in the Terminal.
14. Enable mouseover highlight in stacks
If you want items in grid view stacks to highlight when you move the mouse over them, use the following command. It's slightly different from the equivalent in Leopard. Also, note that you can get the highlight behaviour in Snow Leopard without using this command by using the arrow keys to select items in a stack, or by clicking and holding on a stack before dragging the mouse up onto the grid.
defaults write com.apple.dock mouse-over-hilite-stack -boolean YES
You will need to restart the Dock for changes to take effect. The easiest way is to use killall Dock in the Terminal.
15. Set a precise screensaver password delay
A useful new feature of Snow Leopard is the ability to set how long your Mac is asleep or how long the screen saver is on before it requires a password to wake up again. You can access this from the Security section of System Preferences. However, you have to choose a time period from a drop-down menu, and you can't enter your own custom time period. To do this, use the following command. The number at the end is the time in seconds. For example 1800 is 30 minutes, which bizarrely isn't an option in the drop-down menu.
defaults -currentHost write com.apple.screensaver askForPasswordDelay -int 1800
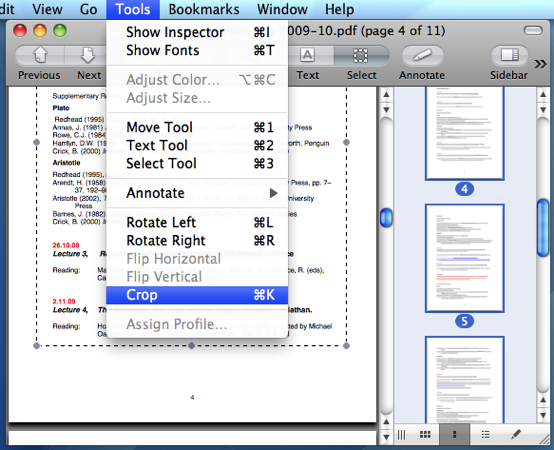
Crop multiple pages in Preview
If you find you have a multi-page PDF with huge margins on every page, you can use Preview to crop those margins down.
With the PDF open in Preview, make sure that the sidebar is visible (in the View menu) and set it to display thumbnails using the button at the bottom.
Change to the select tool using the toolbar button, the Tools menu or by pressing Command-3. Drag a box around the region you want to keep, then click in the sidebar and press Command-A to select all pages.
If you have some pages that are a different orientation (i.e. landscape), you can hold Command and click on these pages to de-select them.
Finally, choose Crop from the Tools menu, or just press Command-K.
Welcome to our new sponsor: TotalApps
Just a quick welcome to our latest sponsor, TotalApps.net. It looks like they've got some really good detailed reviews of Mac and iPhone apps, as well as some great competitions. Be sure to check them out.

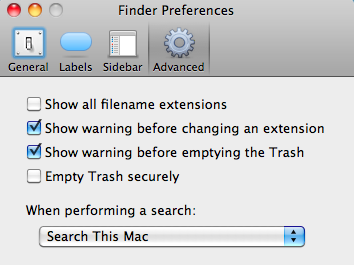
Disable File Extension Warning
If you often find yourself changing file extensions, you might be tired of the annoying "Are you sure you want to change the extension..." dialog box. For example I often end up changing the extensions of text files from .txt to .html.
Luckily, you can disable this warning quite easily. Just go to the Finder Preferences (under the Finder menu in the top left) and click on the Advanced tab. In here, un-check the checkbox "Show warning before changing an extension".
Now whenever you change a file extension, you won't be presented with an "Are you sure" warning.
How to use Network Utility
Everything you can do in Network Utility you can actually do in a Terminal window using unix tools. But why go to all that effort when Apple have created a nice application that lets you do things much more easily.
When you first open up Network Utility you will see nine tabs along the top [Update: eight in Snow Leopard]. Here's a run through of what you can do in each tab.
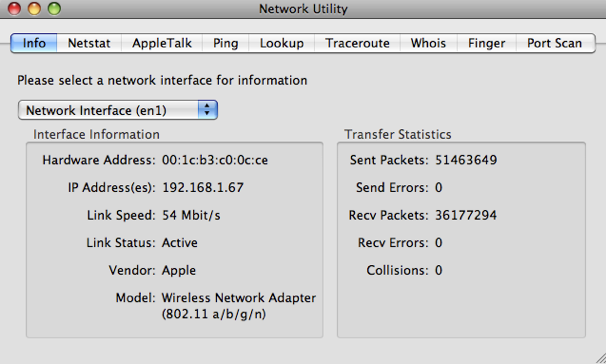
1. Info
The first tab, Info, unsurprisingly gives you general information about your network. The Network Interface drop-down menu shows all the different ways your Mac can connect to the Network. Typically these are ethernet, wireless and Firewire.
The useful bits of information are the Hardware Address and IP Address. You will only have an IP address if that network interface is connected, otherwise it will say unknown. The Hardware Address, otherwise known as a MAC address, can be used to uniquely identify your computer (even though it is possible to change it).
One useful way to use the MAC address is when setting up your wireless router. You can set most routers to only allow specific MAC addresses to join, meaning other people can't log onto your wireless and connect to the internet.
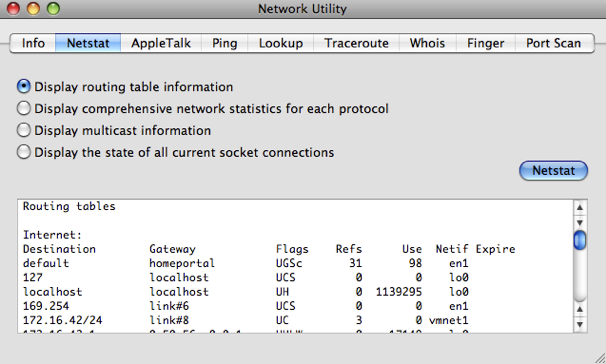
2. Netstat
Netstat is a tool that is really useful to network administrators for troubleshooting, but pretty useless to the average user. If you choose "Display routing table information" and click Netstat, you will get a list that contains all the computers on the network. For example, I get Matts-Macbook, Matts-iPhone and ChrisG5.
If you choose "Display the state of all current socket connections" and click Netstat you'll see a list of your computer's network connections. For example, the first items on the list will correspond to any web pages you have open. If you type the numbers under "Foreign Address" into Safari, the web page will sometimes appear.
3. AppleTalk
The AppleTalk tab is very similar to the Netstat tab, but specifically for Apple's proprietary protocol called AppleTalk. It was very popular in the early days of the Mac, but now has been pretty much abandoned and is unsupported in Snow Leopard. You can read more about AppleTalk on its Wikipedia page. [Update: The AppleTalk tab is completely gone in Snow Leopard]
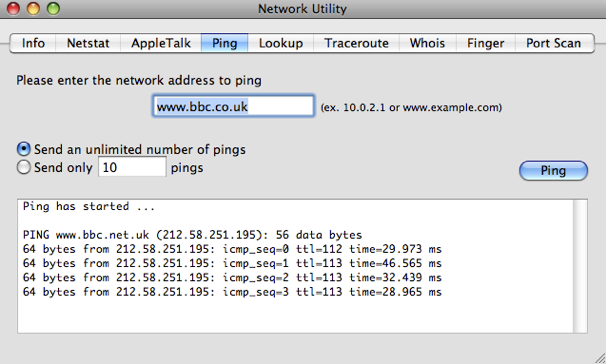
4. Ping
Ping is a tool to check if an internet address is working. When you "ping" an address, you send a small bit of data which it sends back.
You can use this to check if a website is down if it isn't loading in Safari. Alternatively, if you think your internet connection is down, you can try pinging sites that almost never go down like google.com and bbc.co.uk to see if you have a problem on your end.
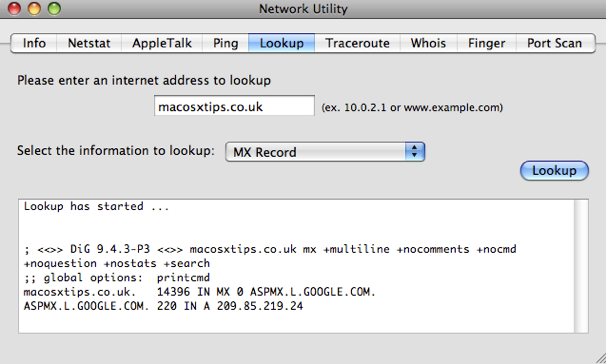
5. Lookup
Lookup allows you to get information about a web site or IP address. The drop-down menu allows you to choose from a number of different types of information. For example, performing a Name Server lookup on macosxtips.co.uk will tell you that this site is hosted by Dreamhost, and a MX record lookup will tell you that our email is handled by Google.
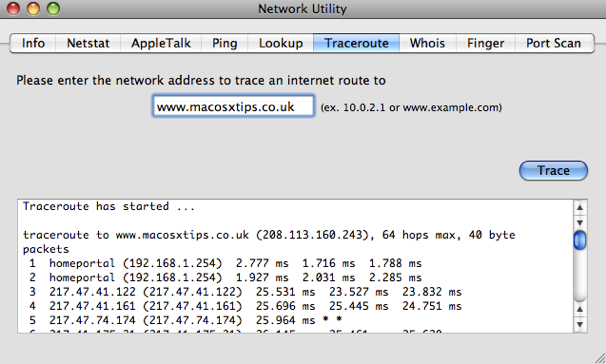
6. Traceroute
When you enter an address and click Trace, traceroute will show you the route taken by data sent between you and the server. It allows you to see all the servers that your data goes through along the way.
You can use this to troubleshoot connection problems by finding out the point where your data is being blocked.
You can also use it when you are downloading a file and have multiple download mirrors in different locations to choose from. Just type the addresses of the mirrors into traceroute and you can get a good idea of which mirror is fastest.
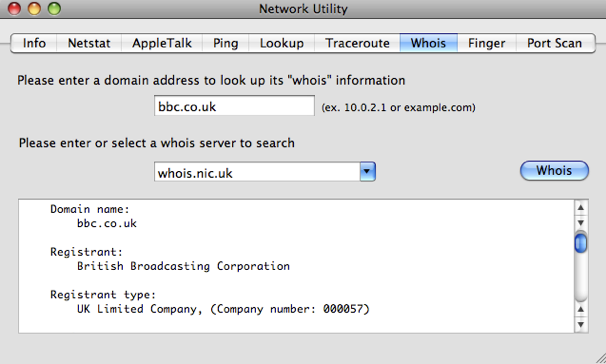
7. Whois
The Whois database gives you information about internet addresses and who has registered them. The default whois server whois.internic.net works quite well for most addresses, but you might have to type "domain apple.com" for example to get it to work. For .co.uk addresses use "whois.nic.uk" as the whois server. You will get information like the registrant, their address, who they registered with, when their registration was started and and when it expires.
8. Finger
Finger, created in 1971, is one of the earliest forms of status updates that are now done using Facebook and Twitter. It's hardly used anymore, but you can use finger to check if your friends are online, and you can post .plan files to your profile similar to blog posts.
One of the best ways to use finger is to type in your username or the username of another user on your Mac. It will tell you if they/you are currently logged in and how long since they/you last logged in.

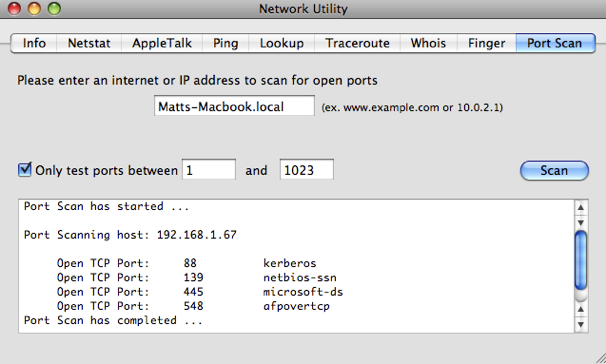
9. Port Scan
The final tab in Network Utility, Port Scan, is for scanning which ports are open at a certain address. These Network ports are a sort of virtual version of the ports on the side of your computer, and each port is for a certain type of network traffic. For example, port 80 is used for web pages.
You can use Port Scan to test your own computer by typing in the name of your Mac followed by ".local". You can find this name in the Sharing section of System Preferences.
Things like iTunes sharing, instant messaging, BitTorrent, AFP and SMB sharing all use different ports. If you find that one of these isn't working, it might be because your firewall is blocking the port that it uses. Instead of turning off your firewall, you can just set it to open that port.
Just run Port Scan with the application or sharing turned off and then again with it turn on to see which port appears. You can then set your firewall to open this port and allow network traffic through. Note that the built in firewall that comes with Mac OS X works on a per application basis rather than a port basis, to keep things simpler for the average user.
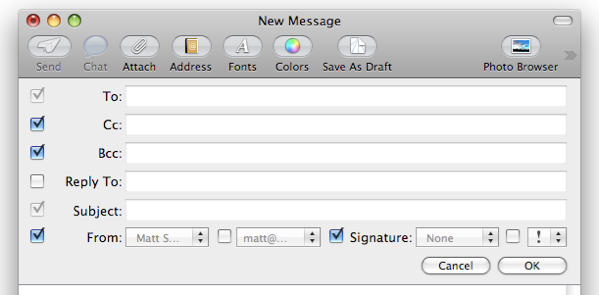
Customize default fields for new messages in Mail
When you create a new message in Mail, you will specify who the message is to and the Subject. However, there are a lot of other fields that aren't enabled by default. You can change what appears by clicking on the button in the bottom left of the toolbar and choosing "Customize..." from the list.
You can enable a signature drop down menu, a priority drop down menu, a Reply to field and drop down menus for choosing which account to send from.
For me, Cc and Bcc were already enabled, and I chose to disable them as I almost never use them.
9 Tips for iTunes 9
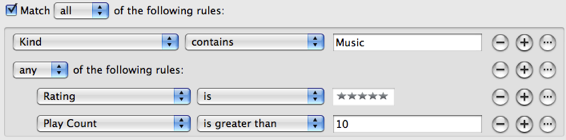
1. Nested rules for smart playlists
As well as the plus and minus buttons for adding multiple rules to a smart playlist, there is now an ellipsis button for adding nested rules. Whereas before you could only set it to match any or all of the rules, now you can make more complex rule combinations.
For example, you could set the first rule, then add two rules at the first nested level by clicking the ellipsis button and then the nested plus button. By then setting the top level to match all rules, and the nested level to match any rules, it will find songs that match both the first rule and either of the two nested rules.
2. Automatically Add to iTunes folder
iTunes stores all of your music inside the iTunes Music (or iTunes Media if you haven't had a previous version of iTunes) located inside the Music folder in your user folder. There is a new addition inside the iTunes Music folder called "Automatically Add to iTunes". Anything that you drop into this folder will be added to iTunes next time it opens, or instantly if it is already open.
This folder isn't in a very convenient place, so to use it properly you will want to drag it to the Dock or Finder sidebar, or create an alias on the desktop by holding Command and Option and dragging it.
Another great use for this is for copying music across a network to another Mac. Instead of having to go over to the receiving Mac and opening up iTunes to import the music, you can just drop the files in this folder directly from the sending Mac.
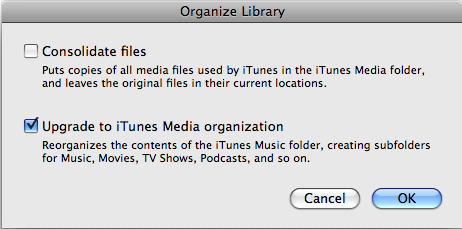
3. Organise the iTunes Media folder
The disorganisation of the iTunes Music folder really shows how iTunes has far outgrown its original purpose. Every time Apple has added a new feature, things have become more muddled. Up until now, Movies, TV Shows, Audiobooks and Ringtones etc. have been added as subfolders of the Music folder, which doesn't really make sense.
To fix this, you can choose “Organize Library” under “Library” in the File menu. In the window that appears, click “Upgrade to iTunes Media organization” and when you click OK, iTunes will sort out the mess in your iTunes Music folder. You will now have an iTunes Media folder, with subfolders for Music, Movies, Apps, TV Shows etc.
There is one reason you might want to avoid doing this however. Your next Time Machine Backup will probably take a long time, depending on the size of your media library.
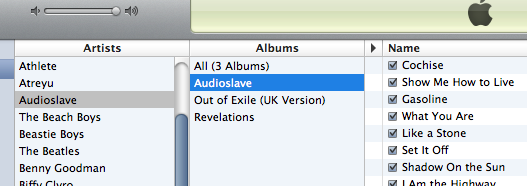
4. Customize the column browser
The column browser in iTunes 9 is better than ever. You can enable it by choosing Show Column Browser from the View menu or by pressing Command-B. The new features that allow you to customise it are located in the Column Browser submenu of the View menu. You can position it to the top or to the side of the main music list, and you can choose which columns appear from Genre, Artist, Album, Composers, and Groupings.
Each playlist can also have its own browser. Apple have demonstrated this by adding a "Classical Music" playlist which has the Composer and Grouping columns, for those who group their music by Composer or Symphony rather than by Artist and Album.
5. Edit your iPhone's app screen
There is a new page for managing which Apps you want to sync to your iPhone and how you want to position them on your iPhone. When you have your iPhone or iPod Touch plugged in, just click on it in the sidebar and then go to the Applications tab.
It's fairly basic, but it's still loads quicker than organising your apps on the iPhone device. There are two major benefits: Firstly, you can drag and entire screen of apps in the list on the right to change the ordering on the screen. Secondly, you can hold Command when clicking apps to select more than one at a time and move them all together.
6. Different way to access the mini player
When you first download iTunes 9, you might think that the mini player is gone. Clicking the green zoom button in the top left now just changes the size of the itunes window instead of changing to the mini player. Now you have to hold Option when clicking the green button to get the old behaviour back.
Update: This appears to have changed back to normal with the iTunes 9.01 upgrade. If you liked the new 9.0 behaviour, simply use the following Terminal command to change it back:
defaults write com.apple.iTunes zoom-to-window -bool YES
7. Make Genius Mixes appear
One of the best new features in iTunes 9 is Genius mixes, a collection of ready made playlists that iTunes creates by analysing your music library. Unfortunately, it doesn't always appear right away. If you can't find Genius Mixes in the sidebar, choose "Update Genius" from the Store menu and it should appear.
8. The shopping cart is gone
If you had the iTunes store set up to add items to a shopping cart instead of buying straight away, unfortunately the shopping cart is now gone. It has been replaced by a Wish List, which works in pretty much the same way. Just click the arrow to the right of "Buy Now" and select "Add to Wish List". Also, in theory, all the items from your shopping cart should have moved over into your wish list.
9. Home sharing
The new home sharing feature allows you to actually share your music between computers, rather than just stream it across the network. This makes it a lot more easier to transfer your purchases between computers without having to use flash drives or email attachments.
When iTunes is open on other computers on the network, they will show up in the sidebar. Simply click on them, then choose any songs to transfer to your computer. This works with any media type including Movies and TV Shows, and it doesn't matter if the media was purchased from iTunes or not. On top of that, you can filter the list to only songs that you don't already have in your library, and you can set iTunes to automatically copy across any new songs that are purchased on the other computer.

However, things become a bit more complicated if you use multiple iTunes Store accounts (i.e. a different one for each computer). The iTunes Store doesn't have to be logged into the same account on both, but Home Sharing does have to be set up with the same account. If you find it isn't working, turn Home Sharing off and then on again from the Advanced menu. Then re-enter the iTunes Store account username and password, making sure you use the same account on each computer. Even though you only use one account for home sharing, you should be able to share songs purchased with either account, as long as both computers are authorised to play them.
Cram competition winners
Here is a list of the winners of last week's competition to win a copy of Cram. These three were chosen at random from all the people who answered the question with the correct answer of iPhone.
Chris Michael Marina
You should receive your serial numbers by email.
Well done to everyone who got the answer right, and keep a lookout for any new competitions for the chance to win more great Mac applications.
Multi-touch tab switching in Firefox
Here’s a great tip I just read over at CrunchGear. Using a hidden setting you can switch tabs in Firefox by making a twisting motion with your fingers. This will only work if you have a multi-touch surface like the trackpads on newer MacBooks. You will also need to make sure you have the latest version of Firefox.
To change the setting, just type about:config into the address bar. A warning will appear telling you that these are advanced settings. Click the “I’ll be careful, I promise” button to continue. Don’t worry about breaking anything, you can right-click and choose reset on anything you change.
Type “twist” into the filter box to filter down to just the settings we want. Find browser.gesture.twist.right and double-click on it. Change the value to Browser:NextTab. Do the same for twist left, but use Browser:PrevTab instead. The gesture should work right away. Try putting one finger down and rotating another around it.
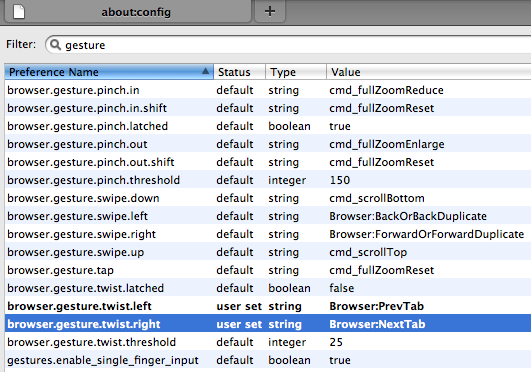
If you find that it is a bit slow to respond, you can change browser.gesture.twist.threshold to a lower value.
Changing the filter to “gesture” will let see all the other gestures that are available. Pinching is set to zoom, and swiping is set to go back and forward. You can change any of these to do something else if you want. For example, the twist gesture is a bit awkward, you might prefer to have tab switching set to the swipe gesture instead.
If you are looking for more settings to change in about:config in Firefox, check out this list.
Create double-clickable dvdmedia movie bundles
When you rip a DVD to your Mac you end up with a VIDEO_TS folder, which can be dragged to DVD player icon to play the DVD (you might find some stubborn DVDs will only play in VLC though).
As the DVD media is a folder, obviously you can't double-click it to open it in DVD Player. Instead you have to do the cumbersome open-the-app-then-drag-and-drop-to-icon procedure.

The way around this is to rename the folder with the .dvdmedia extension. This will turn the folder into a bundle, and add a nice DVD icon as well. Double-clicking this will automatically open it up in DVD player, but you can easily change this to another app like VLC for example. The easiest way is to choose Get Info on the bundle, choose the new app from the "Open with" section, and click the "Change All..." button. While you are in the Get Info window you might also want to click “Hide Extension” and rename the bundle to the name of the movie. You can also change the icon to the artwork for the movie which you can get from a site like Get Video Artwork.
One annoying side effect of this is that Front Row won't recognise dvdmedia bundles, whereas it will recognise VIDEO_TS folders. Of course, to get your movies to work well in the Finder, Quicktime iTunes, Front Row and iPhone all at the same time you might prefer to run them through a tool like HandBrake. This can also save you some space depending on how you encode them.
Competition: Win a copy of Cram
Mac OS X Tips has teamed up with SimpleLeap Software to give away 3 free copies of Cram, their software for studying with flash cards and multiple choice tests. See the bottom of this post for details on how to enter the competition.
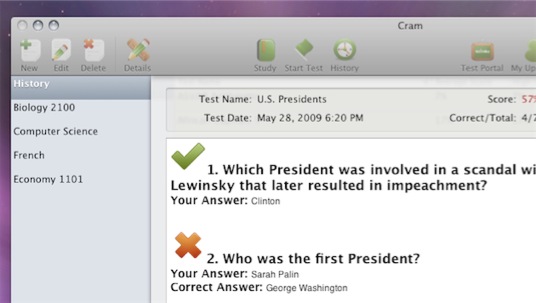
Cram is an application for creating and sharing flash cards and multiple choice tests to help you study. The interface is all very intuitive, and it comes with a few pre-made tests which are great for getting you started and showing you how everything works.
The two main ways to use Cram are to either create your own tests or to browse the tests in the online test portal.
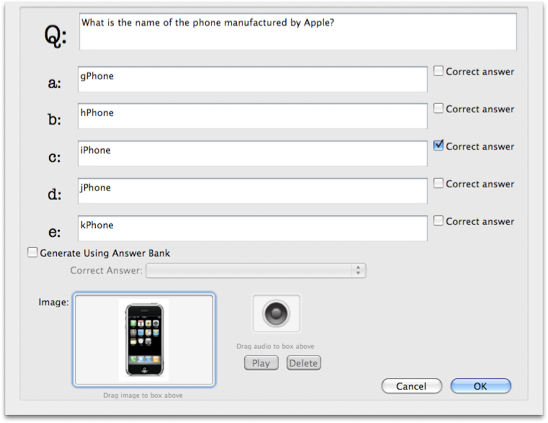
Creating your own test is pretty straightforward. For each question you write, you can enter up to five possible possible answers to choose from. You can either manually choose these for each question, or you can create an "Answer Bank" that contains all the answers for every question in the test (and also some incorrect answers if you want) and then randomly assigns them as the multiple choice answers to each question.
Drag and drop adding of images and audio to your questions is also really simple, and you have the option of setting a time limit to your test.
Once you've created your test, clicking "Study" in the toolbar will allow you to view your questions as flash cards that you can flip over to see the answer. Then as soon as you are confident enough, you can start the test. Cram also keeps a detailed test history so you can track your progress and see if you are improving.
The Test Portal is the alternative to creating your own tests, and it's probably my favourite feature. It contains over 2000 tests on all sorts of subjects submitted by other users. Unfortunately most of them don't seem to be organised into the right categories, but the search feature works well enough to overcome this. Each test has a name and description, and once you've found what you want simply clicking download test will add it to your collection. Of course you can share your own created tests just as easily by selecting them and clicking "Share Test" in the toolbar.
Overall Cram looks like a great resource for students or anyone studying for a test where they have to memorise things. It seems particularly well suited to particular tasks like learning foreign language vocabulary or dates in history.
You can download a demo for free, and purchase the full version for $34.99.
If you want to win a free copy of Cram, just answer the following question. The winners will be chosen at random from all the correct answers.
Which other device can you also get Cram for?
a) iPhone b) Palm Pre c) T-Mobile G1
Once you know the answer, head over to this page to enter.
Ignore Software Updates
It’s really convenient that you get get all the updates for the Apple software on your Mac by going to the Apple menu and choosing "Software Update...". However, occasionally you might want to skip an update, and you don't want Software Update to carry on reminding you to update. A common example is a printer drivers update for a printer you don't use very often or not at all any more.
To ignore an update, just select it in the list and choose "Ignore Update..." from the Update menu. Alternatively you can just press the delete key. Now the update will stop showing up in the list of new software.
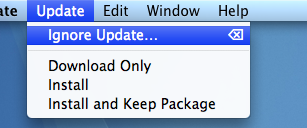
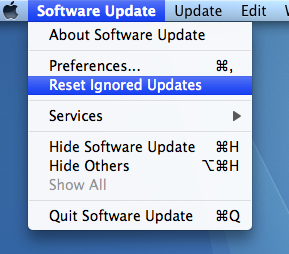
If you change your mind, you can all you ignored updates back by choosing "Reset Ignored Updates" from the Software Update menu. Unfortunately this will bring back all of your ignored updates, so if you only want to bring back one you will have to ignore all the rest again.
Easily remove preference panes
Here’s a trick that I just learnt. You can quickly remove preference panes from System Preferences by right-clicking (or Control-clicking) on them and choosing remove preference pane. Of course this only works on the preference panes that you have installed yourself, i.e. the ones that appear in the “Other” section.

Even though you can just Trash the preference pane file yourself, this is quite a good timesaver if you can’t remember if you installed the preference pane for all users or just your user. Depending on which you chose, the file could be located in the Library folder in Macintosh HD or the Library folder in your user folder. It’s much quicker just to do it straight from System Preferences. Just like if you were Trashing the file, System Preferences will ask you for your administrator password when removing preference panes for all users.
After a bit of a clean out, I’ve managed to cut down to just the preference panes I actually need. I have
- DivX, Flip4Mac and Perian for video formats (Perian is probably the most useful)
- Growl for notifications
- GeekTool for displaying data on the desktop
- Secrets for tweaking all those hidden settings.
Let us know in the comments if there are any other preference panes that you swear by.
Display multiple inspector windows at once
Inspector windows are small windows that allow you to change settings for whatever happens to be the currently selected object. They are the ones that have a thinner title bar, they always hover above other windows and they disappear when you change to a different application.
In most applications they contain information and settings about whatever object is selected. As you select different things, the contents of the inspector window will change, so you can always go to the same place to change the properties of that object.
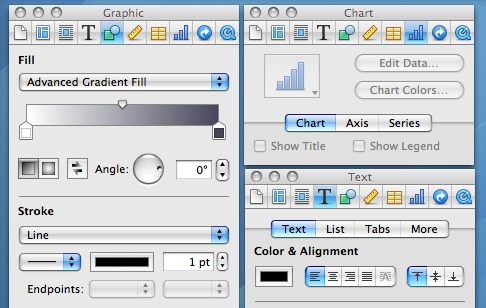
Now you don't want multiple inspectors popping up, containing settings for different objects, because they are designed to keep all the information and properties in one location, so you always know where to find it. However, you might want multiple inspectors that contain different sections of the settings. For example, you might want one inspector for text settings, and one for graphics settings.
In most Apple applications, there is a single inspector with tabs along the top that allow you to change between different groups of settings. If you find yourself constantly jumping between different tabs while you work, there is a simple way to separate each tab out into its own inspector. Simply hold the Option key while clicking on a tab, and another inspector window will appear with the contents of that tab.
Using this, you can arrange the different inspectors around your screen for easier access. For example, in Pages you might want to keep separate Graphic, Text and Table inspectors always open.
Exposé and Spaces tricks
Most people are aware of the different application and window switching tricks in OS X, but real power in tools like Exposé and Spaces is when you start combining them and using them together to really save time.
Firstly lets quickly go through the different ways to switch between applications and windows. The most basic way is to use the keyboard shortcut Command-Tab to cycle through your open applications, and Command-~ to cycle through the open windows of the current application. On top of this, you have the three different options for Exposé: Show all windows (F9), show current application windows (F10) and show desktop (F11). Your function keys may be different if you have one of the newer MacBooks, or if you have changed them in System Preferences. Finally, there is Spaces (F8), which allows you to switch between collections of applications and windows that you have organised into workspaces.
Using some of these techniques simultaneously is a great way to save time. My personal favourite is combining Exposé and Command-Tab. Start by invoking Exposé for current application windows (F10). Once all your windows are shown, you can hit Tab to make Exposé cycle through showing windows for each application individually.
If you are anything like me, when you have applications running in lots of Spaces you occasionally lose track of things. If you have completely lost a window, a great way to find it is to first invoke Spaces (F8) and then Exposé for all windows (F9). First, all of your spaces will appear, then Exposé will rearrange all the windows in every space so you can see them all. You can still drag windows between spaces, and as you do, other windows will automatically rearrange so you can still see them all. And as always with Exposé, hovering your cursor above one of the windows will give you its name.
The best way to find out what combination tricks work best for you is to just try hitting the different function keys in different situation. If you find any other great time-saving combinations, let us know in the comments.
Terminal commands for improving Spotlight
Spotlight works great most of the time, but occasionally you may need to do a bit of tinkering to get it to work properly. Most of us have probably had a problem where Spotlight won’t find a file you know is there. Here are a few Terminal commands for changing hidden Spotlight settings, performing more complicated searches and updating the index.
Add a file to the Spotlight index
In theory, all files are added to the Spotlight index when they are created. However, every now and again something goes wrong and a stubborn file might refuse to show up. To manually add it to the index, you can use the following command. Start by opening up Terminal (located in Applications/Utilities). Type in mdimport and then hit the space bar. Next, find the file you want to add in the Finder, and drag it onto the Terminal window. Terminal should automatically type in the path to the file for you. Of course, if you know the path you can type it in manually yourself. Finally, hit return and the file should now show up in you Spotlight searches.
Add a folder to the Spotlight index
Adding a folder works in exactly the same way as with a file. However, in Mac OS X 10.4 Tiger and earlier, the command is slightly different if you want the contents of the folder to be indexed too. In that case use mdimport -f instead. You might want to use this to add the System folder with mdimport -f /System as it isn't searchable by default.
Search Spotlight from the Terminal
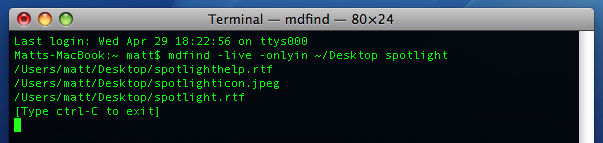
Considering Spotlight is so quick and easy to access, you will probably only use this if you are already working in the Terminal and want to find a file, or if you want some extra options. To do a search, just type mdfind query where query is what you want to search for. To limit this to a specific folder, instead use mdfind -onlyin ~/Desktop query replacing ~/Desktop with the path to your folder. To run a “live” search which will update the results as users add files, use mdfind -live query. Control-C will stop it updating. To see all the other options, look at the man page by typing man mdfind into Terminal.
Re-index an entire drive
If you are having problems with your Spotlight index, you might want to start over and re-index your hard drive. In the Terminal, type sudo mdutil -E / and hit return. You may have to enter your password. The existing Spotlight index will be deleted, and Spotlight will start creating a new index in the background. You can re-index other hard drives by changing the command to include their name, like sudo mdutil -E /Volumes/OtherHardDrive.
Re-index a specific file format
When Spotlight adds a file to the index, it checks to see if it recognises the file type and then uses an mdimporter plugin to index the contents if it does. Each file format has its own plugin, and most are located in Macintosh HD/System/Library/Spotlight or Macintosh HD/Library/Spotlight. Double clicking on a plugin will give you the option to re-index all the files associated with it. Alternatively, you can do this from the Terminal with the command mdimport -r. For example, mdimport -r /System/Library/Spotlight/Chat.mdimporter would cause all of your chat files to be re-indexed.
Add a new file format to the Spotlight index
One of the great things about Spotlight is that it will index the contents of many types of files. For example you can search for a word written in a PDF document or the telephone number of one of your contacts. Many third party applications require plugins to make Spotlight index their file's contents, which are available on the Apple Spotlight plugins page.
Make Spotlight index source code
Apple's developer tools come with a source code mdimporter plugin that allows Spotlight to search the contents of your source code. However, if don't want to install the developer tools (it's a big download) then you can just modify the rich text mdimporter plugin to handle the same job. Go to Macintosh HD/System/Library/Spotlight and find the RichText.mdimporter file. Right-click on it and choose "Show Package Contents". Inside the Contents folder, double-click on the info.plist file to open it in TextEdit. Near the top you will see a list that looks like this:
<string>public.rtf</string>
<string>public.html</string>
<string>public.xml</string>
<string>public.plain-text</string>
<string>com.apple.traditional-mac-plain-text</string>
<string>com.apple.rtfd</string>
<string>com.apple.webarchive</string>
<string>org.oasis-open.opendocument.text</string>
<string>org.openxmlformats.wordprocessingml.document</string>
You can add any of the following lines to the end of this list to enable Spotlight to index the contents of the specified format:
<string>public.c-header</string>
<string>public.c-plus-plus-header</string>
<string>public.c-source</string>
<string>public.objective-c-source</string>
<string>public.c-plus-plus-source</string>
<string>public.objective-c-plus-plus-source</string>
<string>com.sun.java-source</string>
<string>public.perl-script</string>
<string>public.python-script</string>
<string>public.csh-script</string>
<string>public.shell-script</string>
<string>public.ruby-script</string>
<string>public.php-script</string>
<string>com.netscape.javascript-source</string>
When you are done, you will want to double-click on RichText.mdimporter to re-index all these file formats.
If you have another file format that is a really just a text file under the hood, you can find out what to add to the info.plist file by running mdimport -n -d1 somefile.ext in the Terminal. The output should contain a "type" that looks something like the items in the list above.
Remove something from the Spotlight index
This is really straightforward, but I thought I'd include it for completeness. Simply go to System Preferences and click on Spotlight. In the Privacy tab, click the plus (+) and choose your file or just drag it from the Finder.
10 tips for using Mac OS X like a pro
Here is a collection of 10 tips that are slightly more advanced than usual. They are aimed at those who want to become more expert Mac users - and of course those who think they already are experts... In general these tips will help you save time and effort when carrying out day to day tasks and hopefully introduce some concepts and applications you may not have come across before.
1. Download Quicksilver

This is really the most important pro app for Mac OS X. The principle of Quicksilver is simple, but it is amazingly powerful: Hit a hotkey, then start typing what you want to do. You can open an application. Send an email to a certain contact. Pause iTunes. Anything (more or less). But what makes this so incredible is that Quicksilver learns over time so you can get what you want faster and more efficiently with less and less effort. Head here for a more detailed explanation, or if you've got some time to spare, watch this demo video. Download it from the Blacktree site.
2. Get to grips with keyboard shortcuts
This may seem like a really simple tip, but far too often I watch supposedly experienced computer users take forever performing simple tasks like copying and pasting. The fact of the matter is keyboard shortcuts make everything easier, but not only do you have to learn them, you have to get into the habit of using them. There is a hugely extensive list here, but to be honest nothing will save you more time than getting into the habit of using shortcuts for quitting, closing windows, copying and pasting and switching applications.
For the more adventurous, you can create your own keyboard shortcuts in the keyboard and mouse section of System Preferences. And if you want to go even further, here are 10 AppleScripts that you can assign keyboard shortcuts to using Quicksilver.
3. Drag and drop everywhere
This is often a problem that comes from working in Windows a lot, where drag-and-drop doesn't quite have the same power. However in Mac OS X, you can use it almost anywhere. Dragging folders onto open/save dialogs will make it display that folder. Dragging text selections onto icons in the Dock does all sorts of useful things. And you can just drag files onto "Choose File" buttons in web pages.
4. Change hidden settings with Terminal commands

Often developers choose not to include some settings in the preferences of an application in order keep things nice and simple for the user. Luckily, they often leave these hidden settings accessible via the Terminal. Although this will scare off a lot of people, being comfortable with the Terminal is really useful and it's the best way to get a higher level of customisation and enable hidden features on your Mac. Luckily, modifying preference files is one of the easiest things you can do in the Terminal - just paste in a line of code and hit return. Simple! Here is a list of Terminal commands that will work with every version of Mac OS X, and here are some ones just for Leopard.
5. Download VLC
VLC is a multipurpose media player that can play pretty much any movie file you throw at it. While Quicktime will serve you for most needs, VLC will handle anything that Quicktime struggles with, as well as stubborn DVDs and VIDEO_TS folders. Download it here.
6. Understand the concept of packages
In Mac OS X, packages are just folders disguised to look like single files. In fact, almost every application is a package. To look inside packages, just right-click on one and choose Show Package Contents. Why would you want to do this? Inside application packages are all the files it needs to run. Once inside, you can tinker about and change things. Here's a previous tip with a collection of things you can do, including changing the unexpectedly quit message, the iCal alarm message and the layout of System Preferences.
7. Quickly kill accidently opened applications
If you are clumsy like me, you will often accidently click the wrong icon in the Dock. Or maybe you occasionally want to stop iTunes opening up when you plug in your iPod. If you are quick enough, you can just right-click (Control-Click) on the icon in the Dock and choose Force Quit. If you are too late, pressing the Option key will change Quit to Force Quit so you can close the unwanted application even faster.

8. Make rectangular selections (Cocoa apps only)
This is one of the best tricks for saving time when you are moving round chunks of text. If you want to select a column in a table or remove the numbers from the start of each line in a list you would normally have to go through every line individually. This can be hugely time consuming if you have a long list. To get around this, just hold the Option key while making the selection. Now you can draw a box around the stuff you want to copy or delete etc. and not worry about having to select entire lines.
9. Learn some AppleScript
Don't be put off by the idea of a programming language - AppleScript is about as close to normal english as you can get. AppleScript's real power is it's ability to automate repetitive tasks — in fact Automator is basically just a visual way to create AppleScripts. The best way to get familiar with AppleScript is to download some example scripts, try and figure out how they work, and then try and extend them or customise them for your own needs. If you are looking for scripts, I've written loads of tips that use a small bit of AppleScript to solve a problem.
10. Get comfortable using the command line
While you might be fine pasting a single line into the Terminal to change some hidden settings, you might not be comfortable actually working from the command line. I guess the whole point of Mac OS X is that it is a pretty graphical interface placed over the command line, but in reality some things are faster from the Terminal, and some things aren't possible without it. Learning about using the command line requires a whole tutorial in itself so I won't go into it here. O'Reilly have a great series of tutorials for beginners, and OSXDaily have a list of common commands.
Get Windows Live Hotmail in Mail.app
Start by opening up Mail and going to the Preferences. Click on the Accounts tab and create a new account by clicking on the plus (+) at the bottom. Enter your name, email address and password, then click continue to set the incoming mail settings. Enter the following:
Account Type: POP Description: Hotmail (or whatever you like) Incoming Mail Server: pop3.live.com Username: Your email address Password: Your password
In the next section, you should leave the Use SSL checkbox checked and Authentication as Password. For the outgoing mail settings, enter the following:
Description: Hotmail (or whatever you like) Outgoing Mail Server: smtp.live.com Check “Use only this server” Check “Use Authentication” Username: Your email address Password: Your password
As before, leave Use SSL checkbox check and Authentication as Password.
Now you should be able to both send and receive email from the Mac OS X Mail app.
Run Applescripts with Keyboard Shortcuts
In the Keyboard and Mouse section of System Preferences there is a Keyboard shortcuts tab that allows you to assign a keyboard shortcut to any menu item. This is great, but unfortunately it doesn’t work everywhere.
The main loss I notice is being unable to assign keyboard shortcuts to scripts in the scripts menu, which would actually solve the entire problem because you could just create scripts to replicate the functionality of any menu item that doesn't want to have a keyboard shortcut. Luckily you can use Quicksilver to assign keyboard shortcuts to AppleScripts. (or anything else). Listed below are 10 AppleScripts to perform lots of tasks that are much more convenient to do quickly with a keyboard shortcut.
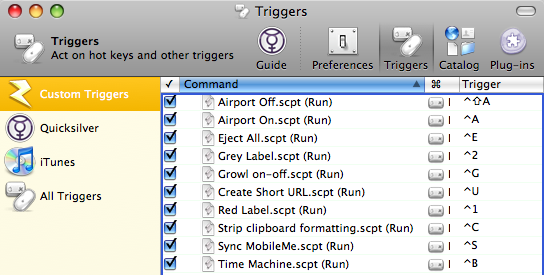
Quicksilver is probably one of the most versatile applications for Mac OS X so I won't try and explain everything it does. For our purposes, we only need to use the "Triggers" part, which is accessible from the Quicksilver preferences. If you want to know more about Quicksilver check out the official "What is Quicksilver", or read through Dan Dickinson's "QuickSilver - A Better OS X In Just 10 Minutes".
For each of the AppleScripts below, this is the process you need to go through to assign a keyboard shortcut.
- Open up AppleScript Editor (located in Applications/Utilities) and paste in the script. You can test it works by clicking Run.
- Save the script in the Scripts folder, located in the Library in your user folder.
- Open up the Triggers panel in Quicksilver (Command-' when quicksilver is visible). If you don't already have Quicksilver, you can download it for free from here.
- Click the plus (+) at the bottom, and choose HotKey from the menu to create a new trigger.
- Start typing the name of the script and it should appear in the box. Alternatively you can just drag it into the box from the Scripts folder. Click Save.
- Assign a keyboard shortcut by double-clicking on the trigger column, and typing the shortcut.
These are just the scripts that I could think of off the top of my head. If you have any others that work well with a keyboard shortcut please share them in the comments.
1. Turn AirPort on and off
The two separate scripts that you need to use are below. It's pretty obvious which is which. As explained above, paste each one into a script editor and save as "Airport Off" and "AirPort On" in the Scripts folder.
do shell script "networksetup -setairportpower off"
do shell script "networksetup -setairportpower on"
2. Run Time Machine backup now
do shell script "/System/Library/CoreServices/backupd.bundle/Contents/Resources/backupd-helper & “
3. Eject All Disks
To eject all disk images, flash drives, external hard drives, CDs and DVDs (i.e. everything):
tell application "Finder" to eject (every disk whose ejectable is true)
To ignore CDs and DVDs:
tell application "Finder" to eject (disks where free space is not 0)
To ignore large drives (like a Time Machine backup). This is good to get rid of all the mounted disk images:
tell application "Finder" to eject (every disk whose ejectable is true and local volume is true and physical size & lt; 1.0E+9)
4. Set colour labels in the Finder
You will need to create one script for each colour, and assign a different keyboard shortcut to each (or just the colours you use regularly). Command-Option-1, Command-Option-2 etc. might work well. The script works with multiple files selected too.
tell application "Finder"
   activate
    set selected to selection
    set colour to 2
    repeat with n_file in every item in selected
       set label index of n_file to colour
   end repeat
end tell
Replace the number in the fourth line with one of the following: 0 = No colour 1 = Orange 2 = Red 3 = Yellow 4 = Blue 5 = Purple 6 = Green 7 = Grey
5. Enable/Disable Growl Notifications
This page over at Mac OS X Hints has a great script for toggling Growl notifications on and off. Really useful for turning them off just before a presentation.
6. Go to Login Window
Quickly switch over to the login window without actually logging out. Works similarly to a "lock screen" shortcut.
do shell script "'/System/Library/CoreServices/Menu Extras/User.menu/Contents/Resources/CGSession' -suspend"
7. Sync with MobileMe
do shell script "/System/Library/PrivateFrameworks/DotMacSyncManager.framework/Versions/A/Resources/dotmacsyncclient sync"
8. Paste as plain text
This script just strips the formatting out of text in the clipboard. So you use Command-C to copy a load of formatted text, then Control-C (or whatever) to strip formatting, then Command-V to finally paste it.
do shell script "pbpaste | pbcopy"
9. Create a short URL
This script creates a short URL of the current page in Safari and copies it to the clipboard. Then all you need to do is paste into where you want it.
tell application "Safari"
   set bigURL to the URL in document 1
end tell
set tinyURL to (do shell script "curl --url \"http://metamark.net/api/rest/simple?long_url=" &  bigURL &  "\" ")
set the clipboard to tinyURL
10. The built in scripts
Most of the scripts that come with Mac OS X are pretty useless, but some are quite fun. They are all located in Macintosh HD/Library/Scripts. Here are the ones to look out for:
- “Show/hide all” in Finder Scripts
- “Create New Message” in Mail Scripts
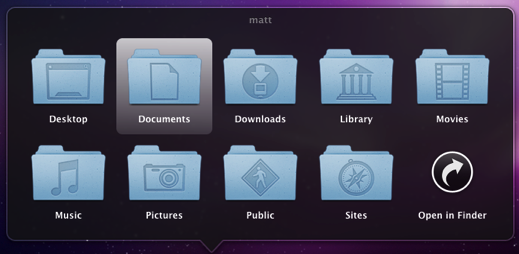
- “New Applications Window” in Navigation Scripts
- “Convert to PDF” in the Printing Scripts
- “Download Weather Map” in the URLs folder
Link to Mail messages in Stickies
Stickies is great for keeping notes and reminders on your Mac without having to go to the hassle of opening up iCal and creating a to do list. I've written about some of the great things you can do with Stickies in the past, but here's a quick tip I just discovered.
Often you will receive an email message which you need to respond to or do something with. You can flag it in Mail (Command-Shift-L) but this doesn't allow you to add any extra text to remind you what you actually wanted to do with the email.
If you use Stickies a lot, a great way to keep a reminder of the email is to just drag it to a sticky note. A link will automatically be created that takes you back to the exact message in Mail when you click it.
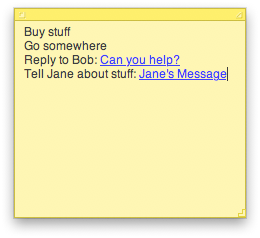
If the message has a subject, that will be the link text. Otherwise it will be something like message:%2DC4DABB48-CEC9-4301-B56D-249C041CDBEA@mac.com%3E (which is the actual link — try pasting it into Safari). You can change the link text by selecting it and typing something new. However, if press delete at any time while writing the new text, everything you write from then on won’t be linked.
So if you keep a To Do list in Stickies, and you have to do something like “Reply to Bob”, you can now add a link to that To Do item so you don’t have to search through your inbox for the message.
A few more GeekTool tricks
Show Basic System Information
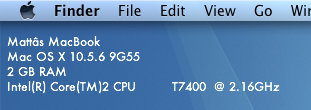
It is possible to use shell commands in GeekTool to display the computer name, operating system version, the amount of RAM and the processor details. This is useful if you have loads of the same model, or if you often remotely control other Macs.
To display this information, just open up System Preferences and click on GeekTool (download it first if you haven't already). Create a new entry, and change the type from File to Shell. Paste the following code into the box:
scutil --get ComputerName;sw_vers | awk -F':\t' '{print $2}' | paste -d ' ' - - -;sysctl -n hw.memsize | awk '{print $0/1073741824" GB RAM"}';sysctl -n machdep.cpu.brand_string;You might notice that each line of the code corresponds to a line of the output. In fact the code is actually 4 separate terminal commands. If you want you can delete or modify any of the lines and it won’t affect any of the others. Just make sure each line ends with a semicolon.
These details pretty much never change, so it's worth changing the refresh time to something very high. It is measured in seconds, so something like 100000 (about one day) should be alright. Once you adjust the font, colour and position, the result looks something like the screenshot below.
Show Free Disk Space
df is a command line utility for getting information on how much disk space you have free. The following command gets the output of the df command and converts it into a more readable format:df -hl | grep 'disk0s2' | awk '{print $4"/"$2" free ("$5" used)"}'Just add this into GeekTool in the same way as usual. "
disk0s2" is the identifier for the hard drive. You can find out what yours is Disk Utility (located in Applications/Utilities). Just click on the hard drive in the list on the left and choose Get Info... from the File menu (Command-I). The Disk Identifier property is near the top of the info window.The second part of the command is awk which rearranges the output. You can change this arround. Just make sure all text is inside double-quotes, and all variables (e.g. $2) are outside. $2 gives the capacity, $3 gives the used, $4 gives the free, and $5 gives the percentage used.
This one would fit quite well with the system info above, but it is likely to change more so you might want to keep it separate and have it refresh more often.
![]()
Display Album Artwork and Song Details of iTunes Currently Playing
I won't go into detail with this, because I don't have it set up on my system. This basically involves using AppleScript to get the details from iTunes. The song details are relatively straightforward to get, but the album artwork is a bit more complicated. Mac OS X Hints shows how to do the song details here, and the album artwork here.
Display a One-line Weather Forecast
Unfortunately this one is for US readers only (or people who want to know the weather in the US). The website Weather Underground gives a single line weather forecast that just compares today or tomorrow to the previous day. As usual, just create a new GeekTool entry, change the type to Shell and paste the following in the box:
curl -s http://www.wunderground.com/cgi-bin/findweather/getForecast?query=12345 | awk '/Today is/ || /Tomorrow is/' | textutil -convert txt -stdin -stdout -format htmlReplace 12345 with your zip code, and you should have a weather forecast for your area. Running this takes a bit of time and system resources, so it's best to change the refresh rate to at least a few hours (about 10000).

Stop GeekTool preventing Sleep
You may have noticed that GeekTool prevents your Mac from going to sleep after the time period set in the Energy Saver section of System Preferences. The display will sleep, but the computer itself will never sleep because it is continuously performing tasks and Mac OS X doesn't think it is idle. This isn't really an issue for me, as I normally close the lid of my MacBook when I'm not using it, but I can see how this would be a problem for others. There is a solution explained over at Mac OS X Hints that uses an application called SleepWatcher to disable GeekTool as soon as the display goes to sleep.
TranslateIt competition winners
David
Marcello
Emmanuel
Loius
Tina
If you’re on the list, you should receive your serial number by email.
Well done to everyone who got the answer right, and keep a lookout for any new competitions for the chance to win more great Mac applications.
Batch rename multiple files
Often you might find you have a folder containing hundreds of files, and you want to rename them all, for example to create a numbered list. In the Finder this would take ages, but luckily you can use the Automator app that comes free with every make to save yourself time and effort.
Start by opening up the Automator app (in the Applications folder) and create a new workflow. Add the following actions by dragging them from the list on the left. First add “Get Specified Finder Items” followed by “Sort Finder Items” followed by “Rename Finder Items”. Your workflow should look something like the screenshot below. When you add the “Rename Finder Items” action, you will be asked if you want to create a copy of the files. Generally you won't want to do this, so click the "Don't Add” button.
Also, once added, the name of the “Rename Finder Items” action will change to “Add Date or Time to Finder Items” - don’t worry, this is normal. This is just the default setting, which you can change by choosing a different option from the first drop-down menu inside the action.
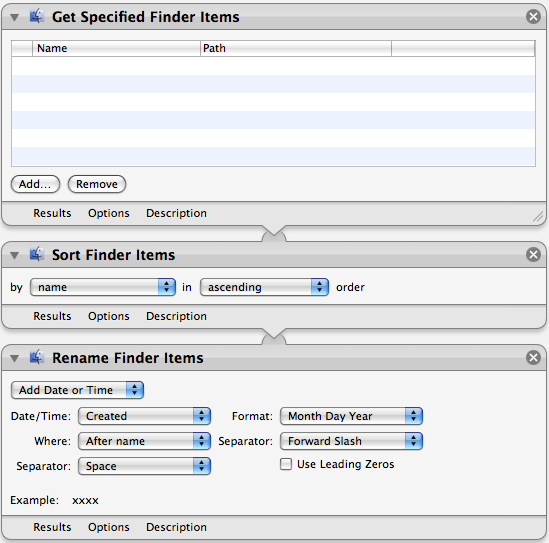
What the workflow does is pretty straightforward. When you click Run in the top right, it gets the files you have added to the list in the first action. You can add the files by clicking the Add button below the list before you run the workflow. The second action then sorts the files by name, size, kind, or whatever you specify. The final action takes this list of files and modifies their file names.
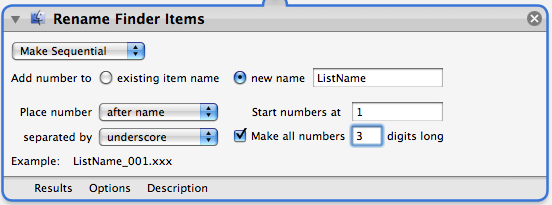
There are a huge amount of options in the “Rename Finder Items” action. The first drop-down menu allows you to choose between adding a date or time, adding text, changing uppercase/lowercase, making a sequential list or performing a find and replace for a string of text.
The second action, “Sort Finder Items” is really optional and only makes a difference if you have the renaming action set to “Make Sequential”. This takes the list in the order it is given and places sequential numbers before or after the file names depending on the files position in the list.
There are a couple of alternative actions that you can use instead of the first “Get Specified Finder Items”. One option is to use “Get Selected Finder Items” instead, which will perform the renaming on whatever files you currently have selected is in the Finder. Another is “Ask for Finder Items”, which will open up a dialog prompting you to choose the files each time you run the workflow. This is a good choice if you want to regularly perform the same renaming on different batches of files. You can then save the workflow as an application (File, Save As... and then choose Application from the File Format menu) that simply runs the workflow when you open it. This gives you a shortcut so you don’t have to open up Automator every time.
Change or disable the Front Row shortcut
This isn't very well publicised, and the only reason I know about it is that I keep accidentally pressing it when I go to Force Quit an application (Command-Option-Escape). People with American keyboard layouts also report accidentally activating Front Row when going for Command-Tilde (cycle through windows). As Front Row often takes a few seconds to load up and it takes over your entire screen, this can be pretty annoying.
If you are as clumsy as me, you might want to change the keyboard shortcut for Front Row. This is easily done by going to the Keyboard and Mouse section of System Preferences. Under the Keyboard Shortcuts tab you should find a list of all the keyboard shortcuts you can change.

Simply double-click on the shortcut for "Hide and show Front Row" and press the new combination you want. I went for Command-Control-Escape, as it's almost the same but much harder to accidentally press.
Alternatively, if you want to disable the shortcut completely, just un-check the box to the left of "Hide and show Front Row". Even if you do this, Front Row is still accessible via the remote.
Competition: Win a copy of TranslateIt!
TranslateIt is a multilingual dictionary for looking up words and translating them into different languages. When it first starts up, you are presented with a list of languages to choose from. After selecting the ones you want, TranslateIt will then translate any word you give it into those languages. It can even translate common phrases. Translation of long portions of text is also possible, but this requires an internet connection as it is performed by a server.
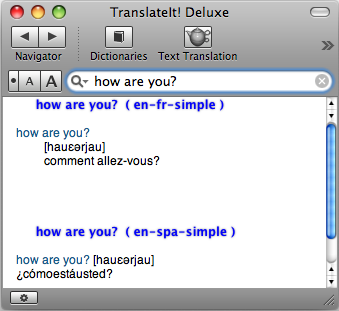
While all these features are useful, they aren't anything you can't do with Google. Where TranslateIt's strength lies is in its integration with Mac OS X and many applications.
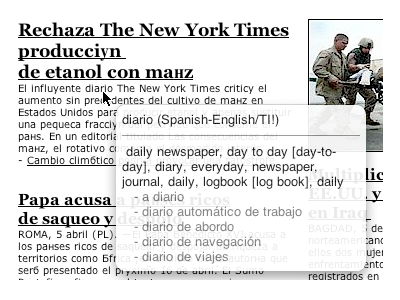
Dy default, TranslateIt has scanning mode enabled. This works much like the Command-Control-D access to the dictionary, but it doesn't require you to press a keyboard shortcut. If you hold the mouse over text in any Cocoa application (TextEdit, Safari, Mail, etc.), a small window will appear with a translation of the text. This might get annoying, so if you don't want it to always appear you can enable and disable it from the TranslateIt icon in the menubar.
An alternative to the scanning mode that works just as well is the keyboard shortcut Command-Shift-M which works from any application. Simply select a word, press Command-Shift-M and TranslateIt will pop up and translate the word.
For non-cocoa applications, there is a contextual menu item so you can right click and choose “Look up in TranslateIt!”. There is also a separate plugin to enable TranslateIt for Firefox.
One feature that caught my eye especially is the words quiz, which looks like a great tool for learning new words. As you are translating words, you can add certain ones to the history by pressing Command-Shift-A. Once you have enough in your history, starting the words quiz from within TranslateIt brings up a small multiple choice quiz to help you learn the translations of the words you have added.
As well as the basic dictionaries included with TranslateIt, some more specialist dictionaries are included on their site. For example, “Russian Psychological Dictionary”, “PC user dictionary” and “Everyday English Expressions” are all available to download for free.
For a chance to win one of 5 one-year licenses for TranslateIt, answer the following question:
What is computer in Russian?
Once you know the answer, head over to this page to enter.
Party with iTunes DJ
The only drawback to this approach is that all the iPhones need to be on your Wi-Fi network, which is inconvenient if you have an encrypted network. Moreover, everyone has to have the Remote application on their iPhone, but they can easily download this straight to the iPhone from the App Store.
To set up iTunes DJ, you first need to open iTunes on your Mac and click on the Settings button underneath the iTunes DJ playlist. In the settings window, you need to check the box to allow guests to request songs, and optionally type in a welcome message. Also check the box to enable voting.
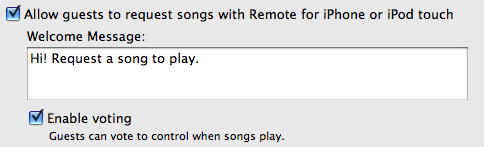
Now, when you open Remote on the iPhone, different things will happen depending on whether you have previously paired with the iTunes library. Paired iPhones are assumed to belong to the host, and therefore have the ability to play, pause, skip song, and rearrange the playlist, just like they did before.

If your iPhone isn't paired to the iTunes library (i.e. you are a guest at the party) then you don't have quite as much control. You can view the playlist, but you can't directly change the order. You can, however, vote for songs to bring them higher in the list, and request new songs to add them to the bottom of the list. This works nicely, because if everyone in the room had the ability to skip songs there inevitably would be chaos.
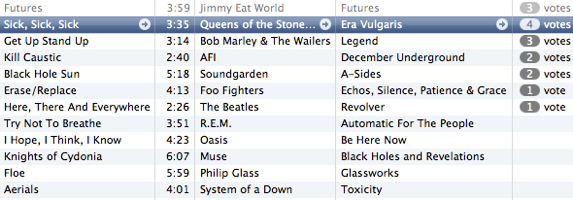
You can also vote for songs by right-clicking on them in iTunes and choosing "Like It" from the menu. You can do this as many times as you like, while you can only vote once from a guest iPhone. This allows the host to manipulate the order if they want to.
For many people this feature will be absolutely useless. It requires that all your friends have iPhones, and I can't for the life of me imagine the kind of party where you log onto the WIFI as you arrive... but it's neat nonetheless.
Tweets on the desktop with GeekTool
If you are looking for more Geektool scripts then check out the Mac OS X Tips Geeklets site. It has loads of user-contributed Geeklets all in one place for you to download.
As reported in TUAW yesterday, a reader named Ben G saw my recent tip for displaying iCal events and to do items on the desktop and took it one step further. Inspired by iCalBuddy, he has written a similar command line utility called twitterbuddy that instead displays the latest tweets by the people you follow. Getting this onto your desktop is pretty much the same process as with iCalBuddy.
Once you have downloaded twitterbuddy, double-click the install.command file to install it. To test it works, open up a new Terminal window and type in
twitterbuddy -h. This should bring up the following list of options:
As you can see, typing
twitterbuddy -u yourusername -p yourpassword -n 5 -t Tweets will display the last 5 tweets you have received, with the title “Tweets”. After perfecting your settings in Terminal, adding the command to GeekTool is easy. As with iCalBuddy, the only subtlety is that you have to use the full path, as shown below:/usr/local/bin/twitterbuddy -u macosxtips -p ******** -n 5 -t Tweets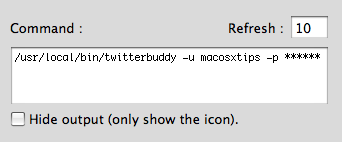
For help setting up GeekTool and formatting your output, check out the iCal on the Desktop tip, as everything is the same. Many thanks to Ali Rantakari, the deveoper of iCalBuddy and Benjamin Goering, the developer of twitterbuddy for all their hard work.
Also, if you want to, follow me on Twitter.
Annotate non-PDF images in Preview
With an image open in Preview, go to the View menu and choose Customize Toolbar. In the window that appears, drag the Annotate button up onto your toolbar, then click Done. Now, the Annotate options in the Tools menu may be inactive, but the toolbar button still works.
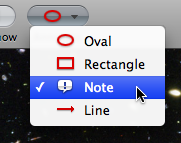
As usual, you can choose Show Fonts and Show Colors from the Tools menu to edit the look of your annotations. In addition, the - (minus) and + (plus) keys will change the thickness of your lines.
There are a few little quirks with this though. Firstly, I sometimes had problems re-opening the Fonts window after closing it. If this happens, quitting and reopening Preview seems to fix it. Secondly, note that saving the file makes the annotations permanent, meaning you can't edit them. Thirdly, the options like shadow and underline in the Fonts panel don’t seem to work. The changes happen, but revert back to normal as soon as you close the Fonts window. Finally, you can't copy and paste your annotations like you would do to other objects. Instead, this just copies and pastes the entire image.
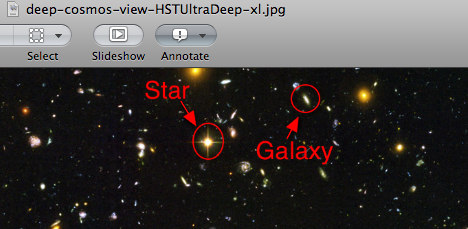
These small flaws aside, this is a great way to quickly make rough changes to images without having to resort to third party software. It's great for adding quick notes to screenshots, and I even made my Twitter Background using it.
CleanMyMac competition winners
Nuno
Stuart
Gary
Alberto
Brian
Antonio
Mark
Nicolas
Roger
Prescott
If you’re on the list, you should receive your serial number by email.
Well done to everyone who got the answer right, and keep a lookout for any new competitions for the chance to win more Mac Software.
Speed up iPhoto '09
It turns out you can speed things up by "vacuuming" the database that holds all your photos. This is basically just a Terminal command that does a bit of tidying up. Over time the iPhoto database becomes fragmented, with information scattered in various places around the database file amongst regions of empty space. The vacuum command cleans up the database by removing the unnecessary parts and reorganising the file structure.
To vacuum your iPhoto library, start by making sure iPhoto isn't open, and then open up Terminal (located in Applications/Utilities). Firstly, you have to point the Terminal to where your iPhoto Library is using the cd (change directory) command. By default, this should be:
cd "~/Pictures/iPhoto Library"Paste the above line into the Terminal, then hit return. If your iPhoto Library isn’t in your Pictures folder you will have to adjust the command to your specific needs. Next, to perform the vacuum, use the following command:
for dbase in *.db; do sqlite3 $dbase "vacuum;"; doneAs before, just paste this line in then hit return and you're done.
How To Send or Share a File With iChat
iChat is a useful program, and many people use it simply for messaging or video chatting. However, it is possible to get more functionality out of iChat than just video conferencing. You can use it to send a file directly to someone, or you can choose to share a live copy of the file with your friend using iChat Theater. This tutorial is for OSX Leopard.
First, open up iChat and log into your messaging program. Once you’ve done that, select the person you wish to talk to by either clicking the icon by their name in your buddy list or going to the File menu and selecting New Chat With Person. At this point you can begin video chatting as you normally would. The person you’re talking to won’t need a webcam for this or any other part of this guide to work – they will still be able to see you and the files you share as long as you have a webcam installed, iSight or otherwise. Just right click on their name in your buddy list and invite them to a “One-Way-Video-Chat” and you’re all set.
Next, locate the file you wish to send or share and simply drag it onto the Video Chat window. It can be a document, a picture, a movie – anything. A prompt with two boxes will come up asking you if you want to send the file or open it with iChat Theater. If you just want to send them a copy, this is where the guide ends for you – simply drag the file to the first box and it will transfer instantly. If you wish to share the file with them so that you can both look at the file at the same time, drag it to the second box. You can also select the File menu and click “Share a File With iChat Theater”.

Sharing a Keynote Presentation
Now that you’re sharing your file with the person you’re chatting with, a window will open alongside the Video Conference window with your file in it. This is the same exact image that the person on the other side can see. As the initiator, you have complete control over how the file looks. That means you can scroll down a document to a certain point, zoom in on a picture to emphasize a particular section, or breeze through a movie to the exact clip you want to show them. The other person can “look but not touch”, meaning they will see all your changes but can’t change anything themselves. This can be useful for illustrating exact points that might be tough to describe in words.
And that’s it! Sharing files with friends and colleagues has never been easier. When you close the window you can go back to video chatting as normal, or you can start the process all over again with another file.
[Matt adds: As far as I know, you don’t even need a webcam yourself. Just go to “Share a File with iChat Theater” in the File menu to start the process from outside a video chat. You’ll see that iPhoto has a separate option to allow you to access photos within your iPhoto library. Also, note that only files that work with Quick Look will work in iChat Theater.]
14 Tips for Safari 4 Beta
1. Download Safari 4 beta
As this is just a beta version, Apple doesn't include it in the automatic Software Update. To get the new version, head over to the Safari 4 beta page on the Apple web site. Bear in mind this will get rid of Safari 3, but there is an uninstaller included if you ever want to revert back.
2. Update your plugins
While most plugins for Safari should be fine with the new version, InputManagers are likely to need updating. 1Password has released an update, but you have to go to the 1Password app in your Applications folder to access it. Go to the Preferences and in the updates section, check the box that says Include Beta versions. Now when you check for updates it should download a version that works with Safari 4. Updates for Glims and Saft are already available from their respective sites, but as far as I know PithHelmet and SafariStand haven't been updated yet.
3. Safari breaks Xcode
This one is mainly for developers. If you are using the 3.0 version of Xcode, you will find that it crashes on launch once you have downloaded the Safari 4 beta. Just head over to the Apple Developer Connection to download version 3.1.2 of Xcode that works fine.
4. New keyboard shortcuts
Now Control-Tab will allow you to cycle through your tabs (as opposed to Command-Tab that cycles through applications). Don't worry if you were used to the old shortcut though, Command-Shift-Arrows still work.
5. Add the zoom button
The new zoom feature works just like Safari on the iPhone. Instead of just increasing the font size, it increases the size of images and other media too. You can access this from the View menu or with the Command-+ and Command-- shortcuts. Alternatively, choose Customize Toolbar from the View menu to add the zoom button to the toolbar.
6. Restore the old style tabs
One of the biggest changes visually is the new tabs, located along the top of the window. If you aren't a fan of this, a simple Terminal command will move them back to the old position. Just open up Terminal (in Applications/Utilities) and paste in the following line:
defaults write com.apple.Safari DebugSafari4TabBarIsOnTop -bool FALSETo bring back the new tabs on top, just repeat the command with
TRUE at the end. You will need to restart Safari for changes to take effect.7. Disable search suggestions
Now the Google search box gives suggestions for your search as well as recent searches. To disable this, just use the following Terminal command in the same way as above:
defaults write com.apple.Safari DebugSafari4IncludeGoogleSuggest -bool FALSEAs before, repeat with
TRUE at the end to bring back suggestions.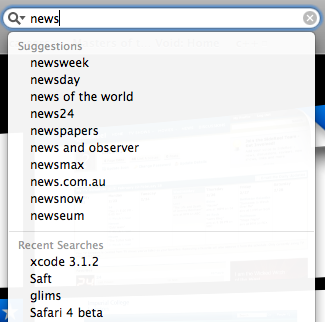
8. Bring back the old progress bar
Unfortunately, the new spinning progress indicator doesn't give you a good idea of how far the page has loaded. To bring back the old style, you have to use both of the following commands.
defaults write com.apple.Safari DebugSafari4IncludeToolbarRedesign -bool FALSEThis changes the progress indicator to a blue pie chart. To get the blue bar, now use the following command:
defaults write com.apple.Safari DebugSafari4LoadProgressStyle -bool FALSERepeat both commands with
TRUE at the end to go back to the new style.9. Disable bookmarks Cover Flow
If Cover Flow isn't your thing, you can get rid of it in the Bookmarks window by using the following Terminal command:
defaults write com.apple.Safari DebugSafari4IncludeFlowViewInBookmarksView -bool FALSERepeat with
TRUE at the end to bring back Cover Flow.10. Disable dimming in Top Sites zoom
When you choose a page in Top Sites, it zooms in to take up the whole page with a neat animation effect. To stop the page dimming during this, use the following Terminal command:
defaults write com.apple.Safari DebugSafari4TopSitesZoomToPageAnimationDimsSnapshot -bool FALSERepeat with
TRUE at the end to revert back to the original behaviour.11. Disable Top Sites
If, for some reason, you want to completely disable the Top Sites feature, use the following command:
defaults write com.apple.Safari DebugSafari4IncludeTopSites -bool FALSERepeating with
TRUE at the end will enable Top Sites again.12. Disable "fancy" URL suggestions
This is actually one of my favourite new features in Safari 4. When you are typing in a web address, suggestions are separated into Bookmarks, History and a Top Hit. If you prefer the old window, use the following command:
defaults write com.apple.Safari DebugSafari4IncludeFancyURLCompletionList -bool FALSERepeat the command with
TRUE at the end to enable the fancy completion list again.13. Add web sites to Top Sites
If you click the Edit button in Top Sites, it is easy to use the pins to force sites to stay in Top Sites. To manually add a site that isn't already there, open it up in a separate window, then drag the favicon (next to the address) over to one of the positions in Top Sites. You can also drag sites from your bookmarks to Top Sites.
14. Fix GrowlMail
Unfortunately GrowlMail will now cause Mail to crash. There is a quick workaround that involves putting GrowlMail into summary mode. Do this by using the following Terminal command:
defaults write com.apple.mail GMSummaryMode -int 2Supposedly the next version of GrowlMail should fix this problem.
Competition: Win a copy of CleanMyMac

CleanMyMac is a bit of an all-in-one application with many different functions. Its main role is to clear up unneeded files to save disk space and improve system performance. On top of this, it allows you to fully uninstall applications and widgets that often leave files hidden all over your Mac, and it has a quick erase function that will allow you to delete files that the Finder has trouble with.
When you first open it, CleanMyMac scans your hard drive and compiles a list of all possible files that you might want to delete, and separates them into sections. One of the great strengths of CleanMyMac is that it clearly explains what the files in each section do so you can make an informed decision on whether you actually want to delete them.
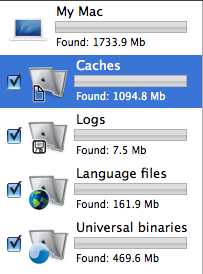
The first two sections, caches and log files, are the safest to delete. They normally accumulate over time, taking up a considerable amount of space. Caches actually speed up the loading of applications, but often you have caches left behind by applications you don't regularly use that take up lots of space. Log files are often used for troubleshooting when something goes wrong, but the average user won't ever use them. It is important to note that even if you delete your caches and log files, your Mac will carry on creating them if it needs them again. So on the upside you won't delete anything vital, but on the downside you will have to run CleanMyMac every now again once the files start to accumulate.
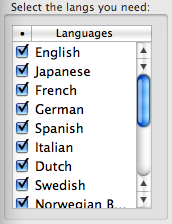
The next two sections, language files and universal binaries, are for slimming down your applications. Most applications come with the files for loads of different languages, and the binaries for both PowerPC and Intel Macs. Obviously you are likely to only use your applications on one type of Mac and in only one language, so it is fine to delete the rest to save space and speed up performance. CleanMyMac allows you to choose from a list of what languages you want to keep, and automatically deletes the parts of the application that your Mac doesn't use. The only problem with this is that you won't be able to get these parts back without installing the application from scratch again, should you ever learn a new language or transfer your applications to a different type of Mac. There are also a couple of applications that are broken by this, but CleanMyMac has a blacklist that should prevent it from trying to slim these down.
Finally, as a sort of extra feature, CleanMyMac allows you to fully uninstall applications and widgets. While this is normally a fairly straightforward task of dragging the application to the Trash, some applications leave files littered around your Mac, normally in the Library folder. CleanMyMac will search and find all the separate files, so you can fully get rid of the application.
One thing I will note is that the licensing scheme seems a little bit overpriced. If you are interested in buying CleanMyMac, it seems the best value is to go for the lifetime license special offer that they currently have, which gives you MacHider included for free as well.
Overall, CleanMyMac’s main strengths come with its great user friendly interface with clear explanations, and the fact that it does so many things in one. While it’s true that other applications will do some of the same things as CleanMyMac, none will do them all, and none will do them in such a clear, easy to use way.
If you want to win a free copy of CleanMyMac, just answer the following question. The winners will be chosen at random from all the correct answers.
What is the name of the company that makes CleanMyMac?
a) MacClaw
b) MacDraw
c) MacPaw
Once you know the answer, head over to this page to enter.
Hello to our new sponsors
Firstly we have FixTunes, who we ran a competition with last week to give away 10 free copies. The software is pretty good, so if you are interested in tidying up your iTunes library head over to their site to try it out.
Secondly we have CleanMyMac, another outstanding application that performs a multitude of tasks that keep your Mac in top condition. And don’t worry if you missed out on the FixTunes competition last week because CleanMyMac have provided 10 free copies for me to give away too.
Last, but not least, we have Appstorm, a blog that reviews applications as well as offering hints, tips and general Apple news. Definitely worth a look.
Display iCal Events and a To Do list on your desktop
If you are looking for more Geektool scripts then check out the Mac OS X Tips Geeklets site. It has loads of user-contributed Geeklets all in one place for you to download.
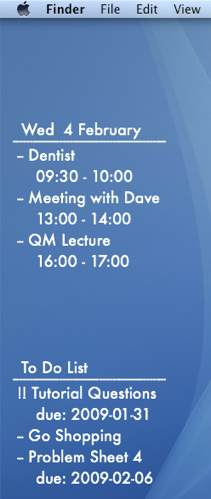
1. Get GeekTool and iCalBuddy
To set this up you need to download two (free) applications. The first is GeekTool, a preference pane that allows you to display files, images and shell scripts on the Desktop. The second is iCalBuddy, a command line utility that lets you access events and to do items without having to open iCal.
Download GeekTool from here and install it by double-clicking on the preference pane. You can now access it by going to System Preferences and looking in the bottom row.
Download iCalBuddy from here and double-click it to unzip the folder. Then double-click the install.command file, and enter your administrator password when the window appears. You can then close the window. 2. Set up GeekTool
Once you click on the GeekTool section in System Preferences, you will see a window with three different icons. Drag the one called “Shell” to a position on the desktop behind the window. A black “Properties” inspector window will appear, where you can enter the settings for this geeklet. The bits you need to change are the Command and Style sections. In the command box, paste
date and click the button below to set the font and colour to something that complements your background and make it a bit bigger. If you look on your desktop now, the date should be written in the top left. You can click and drag this around to where you want it, or you can type in the position in the bottom right of the GeekTool window. As you can see, the time only updates every 10 seconds. You can change this in the Refresh box above the Command box.3. Change the appearance
If you have a dark Desktop background, you may find that you can't see the date. By default the date appears in an ugly plain fixed width font with a black text colour. To make this more visually appealing, click on the "Colors and Font" tab and adjust the settings. You can see my settings in the screenshot below. Obviously lighter text colours work better with darker desktop backgrounds and vice versa.
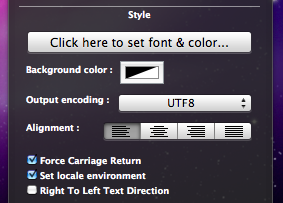
The Shell option on GeekTool works just like the Terminal. If you type
date into the Terminal and press enter, you should get exactly the same thing back as shown by GeekTool. Conveniently, the date Terminal command has a number of options to change the style of the date. As you can see, the default setting includes the time, time zone and year that I don't really want. The command for my preferred date format is date '+%a %e %B' which gives something like Wed 18 February. Apple has a list of formatting options here you can use to change it to whatever you want. You need to put a + at the start, followed by the symbols for the bits you want. You can but punctuation like commas between the symbols, and the whole thing has to be enclosed in single quotes.
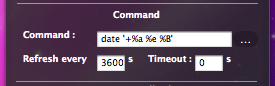
This is where the iCalBuddy application comes in. Create a new geeklet by dragging the “shell” icon onto the desktop as before. In the Command box type
/usr/local/bin/icalBuddy eventsToday. This should bring up a list of today's events on the desktop. There are loads of customisation options for iCalBuddy, so I won't go through them all, but I'll show you mine. The command I use is:/usr/local/bin/icalBuddy -nc eventsToday | sed -e "s/*/--/" | sed -e "s/!/!!/"-nc part removes the calendar name in brackets because all my events are in the same calendar. The sed -e "s/*/--/" part changes the * at the start of each event to a -- because I think it looks better. The "sed" and "awk" commands are really useful for customising the output, but I won't go into much detail here. Just do a Google search for a tutorial if you want more information. For the different iCalBuddy customisation options, check out the man page.One customization to note is the "eventsToday+NUM" option. Replacing
eventsToday with eventsToday+3, for example, will display the events for the next three days in separate sections titled by the date.6. Add to do items
To do items work in pretty much the same way as the iCal events. The command to use is
/usr/local/bin/icalBuddy uncompletedTasks. Similar to before, the command I use is:/usr/local/bin/icalBuddy -nc uncompletedTasks | sed -e "s/*/--/" | sed -e "s/!/!!/"7. Add some titles
If you just want GeekTool to display some text, the easiest way to do it is to use the
echo command. Just create a new entry and use the command echo To Do List to make it display "To Do List" on the Desktop.8. Set the Refresh rate
The next thing to do is to set a suitable refresh rate for each item. It is worth noting that these command take very little system resources, and having them all update every 10 seconds produces absolutely no decrease in performance whatsoever that I've noticed. However, in principle you should only really make them refresh as much as you need them too. I've set all mine to update once an hour (3600). This means that the worst case scenario is that the information is wrong for up to an hour between midnight and 1am each night. If you like having the time displayed in the date command, you probably want that to update every second.
8. Make it pretty
Finally, you just have to change the font and colour of each entry and position them somewhere you want on the Desktop. I went for the far left as it's a place guaranteed not to get covered up by icons.
9. Go crazy
There are hundreds of things you can do with GeekTool, and it's definitely worth trying them out and seeing what you like. In the end, I only kept the iCal events and to do list, but you may like having constant updates of your uptime, running processes, CPU use, local weather maps, IP address, current iTunes track etc. Check out the Mac OS X Tips Geeklets site for more.
20 tips and tricks for iLife and iWork '09


iPhoto
1. Enable scrolling zoom in Places maps
The new Places feature in iPhoto allows you to explore your photos on a map. Photos taken on a GPS enabled camera (i.e. the iPhone) will be automatically geo-tagged, or you can enter the location information manually. Annoyingly, by default the maps don't allow you to zoom using the two-fingered scroll on the trackpad or a scroll wheel on your mouse. To enable this, just open up Terminal (in Applications/Utilities), type the following line and hit enter:
defaults write com.apple.iphoto MapScrollWheel -bool YESTo disable the scrolling zoom again, just repeat the command with NO at the end instead.

2. Include location information in uploaded photos
The default setting is for iPhoto to remove the geo-tagging information from your photos when you upload them to the web, presumably so people don't unwittingly broadcast their location to the world. If you want to keep the location information in uploaded photos, go to the Web section of iPhoto preferences and check the box next to "Include location information for published photos."
3. Set a key photo for someone
Changing a person's key photo is exactly the same as changing the key photo for an event. Just move your mouse from left to right over their photo on the corkboard to cycle through all the photos of that person. When one you like is displayed, just hit the space bar to make that the new key photo. If you can't find the one you want this way, just go into that person's photos, right click on the new key photo and choose "Make Key Photo" from the contextual menu.
4. Enter information about a person
When you hold your mouse over someone in Faces, an small i appears. Clicking on this will allow you to enter a full name and email address for that person. It will also show you the number of photos with that person in, and the range of dates of photos they're in.
5. Batch accept or reject faces
If you look at a person's photos in Faces, there will be a group of unconfirmed faces that iPhoto has identified for you. To confirm a large group of faces at once, just drag across all the photos. To reject a group of photos, hold the Option key while doing this. You can also just Option-click on photos to reject them individually.
6. Corner-achored resize when adding faces
iPhoto's default behaviour when adding a missing face is a centre-anchored resize. To change this to the usual corner-anchored resize, just hold down the option key when dragging over a face.
7. Easily switch between multiple libraries
iPhoto libraries are now double-clickable from the Finder. If you want to open a different library in iPhoto, just open up your Pictures folder and double-click a different library file. iPhoto will then load up with the new library. No need for holding Option on launch anymore.
GarageBand
8. Create iPhone ringtones
To create a free ringtone from any MP3 or AAC file just choose "Example Ringtone" from the iPhone Ringtones section in the New dialog. Delete the example that Apple has provided, then select a song from your iTunes library by clicking on the Media button in the bottom right. Drag your chosen song into your GarageBand project. Move and resize the yellow bar at the top to choose the section of the song you want to loop for your ringtone. Finally, choose "Send to iTunes" from the Share menu.
9. Use Learn to Play on PowerPC or Core Solo Macs
The new Learn to Play lessons in GarageBand require a dual core Intel based Mac to run. If you are running an old PowerPC Mac or Core Solo Mac Mini, you can get around this by going to /Library/Application Support/GarageBand/Learn to Play/Basic Lessons. Once here, double-click on one of the .mwand files to open it in GarageBand. Consider closing all the other applications on your Mac if the lessons run slowly.
iMovie
10. Get movies from other locations
If the videos you want aren't in the Event Library, just right-click below your list of events to import videos from anywhere on your hard drive or from within an older iMovie file.
11. DVD chapters are back
One feature that disappeared for a while was the ability to add DVD chapters in iMovie. For a while you had to do a laborious work around involving GarageBand. Now you can add chapter markers in iMovie, and they'll be carried across when you export to iDVD.

12. Add a location to travel maps
If you want to use a location in the travel maps feature that iMovie doesn't have listed, you can add it to the locations file. Find iMovie in your applications folder, right-click on it and choose "Show Package Contents." In the Resources folder find WorldLocations.txt and open it up in TextEdit. On a new line, enter the place name followed by a tab, then the region followed by a tab, then the country followed by a tab, and finally the latitude and longitude separated by a comma. For example you could add
Duxford Cambridge UK 52.093851,0.184870iWork
13. Get the free trial
As well as the boxed version, Apple offers a free 30 day trial of iWork to download from their web site. One thing to remember though is if you don't intend to upgrade after 30 days, remember to save any new or changed files back in the iWork '08 format just in case they don't work any more once your trial expires. You can do this by choosing iWork '08 from the "Save copy as" menu in the Save As dialog.
14. Enable hidden picture frames
Pages, Keynote and Numbers all have various different styles of picture frame that you can place around any object by choosing it from the stroke menu in the Graphic Inspector. However, it turns out there are loads of frames that are disabled by default. You just need to edit a single file to enable them.
Choose the application where you want to enable the hidden frames (Pages, Keynote or Numbers), right click and choose "Show Package Contents". Look in the Resources folder for one of the three following files:
For Pages, look for SLGraphicInspectorFrames.plist
For Keynote, look for BGGraphicInspectorFrames.plist
For Numbers, look for LSGraphicInspectorFrames.plist
Open it up in TextEdit, and notice how the names of the different picture frames are listed. The new frames available with iWork '09 are Fine_Artist, Jet Set, Moroccan, Nature, Nature2, Typeset, Venetian, Venetian2, and Venetian3. For example just add <string>Fine_Artist</string> to the end of the list. As well as these new frames available in iWork '09, there are many more that also work in iWork '08 listed here.
http://nemws1.googlepages.com/keynoteframepreview
15. Temporarily disable guide lines
When moving objects around, all the iWork applications helpfully give alignment guides that will snap the objects so they are perfectly in line with each other. Sometimes, when you don't want objects aligned or you want to align them in a different way, this can be quite annoying. The way to temporarily disable the guide lines is to hold down the command key while you are dragging the object. Now your shape, image or text box can be freely dragged to whatever position you want.
16. Password protect iWork documents
This is something that has been annoyingly difficult to do on the Mac for a long time. Generally previous solutions involved creating encrypted disk images, however, now all the iWork applications have a "Require password to open" option in the Document section of the Inspector.
17. Export has moved
The export command that used to be in the File menu has now moved to the Share menu. Also, remember that if you want to export to Microsoft Word format, you can now do this directly from the Save As... option.
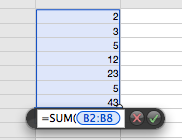
When creating functions and formulas in numbers, you almost always want to refer to another cell or group of cells. In Numbers '08 you had to use the mouse to select these cells, but now you can use the keyboard to select them. Simply hold down the Option key and use the arrow keys to move about. To select a group of cells, hold down Shift as well as Option, and continue using the arrow keys to make the selection. To change the reference from relative to absolute, just hit Command-K to cycle through all the different possibilities.
19. Advanced Gradients
The gradient fill options in iWork '08 were fairly limited. In iWork '09 you can now create linear or circular gradients with as many colours as you like by choosing "Advanced Gradient Fill" from the Fill menu.
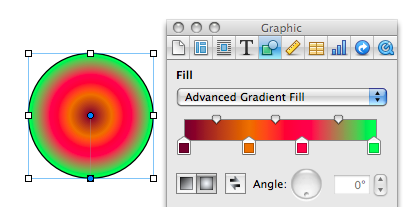
20. Applescript in Numbers
One of the great new features of Numbers is Applescript support. Here are a few example scripts to give you an idea of what kind of thing is possible.
FixTunes competition winners

Josh
Kay
Eric
Angus
Piotr
Alejandro
Rick
Thomas
Jake
Ruben
Well done to them, and they should have received their serial numbers by email. For all those who entered and didn’t win, hopefully there will be another competition in the next couple of weeks.
Competition: Win a copy of FixTunes!
FixTunes is an application that scans through your iTunes library and adds any missing artwork and song information, and corrects any spelling mistakes or inconsistencies in the existing information.

The problem with iTunes is that it requires most of the song information to be present and correct otherwise it will be unable to find the album artwork. In constrast, FixTunes uses a smart system of searching a database and finding the most likely result, even if some of the information is incorrect. Then, with one click, you can correct the mistakes in the song information and add the album artwork.
FixTunes also offers some great flexibility when it comes to fixing your songs. Firstly, you can set it to automatically fix all your songs at once or alternatively it can go through them one at a time allowing you to review the changes and choose "skip" or "fix" for each song. It's definitely best to start off with the one by one mode. As shown in the screenshot, a percentage accuracy is displayed for each match. Generally this is quite high, but if the song is missing from the FixTunes database then the next best match is typically around 60%. When using the automatic mode, you set a threshold on the accuracy so FixTunes won't change anything for matches under a percentage. This is a great way to do it, but so far I haven't quite worked up the nerve to let it at my whole iTunes library on automatic.
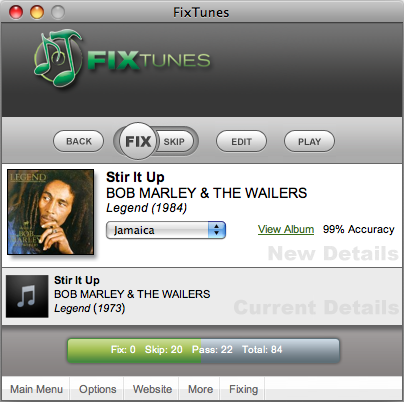
You can also set FixTunes to work through a playlist, so you can set aside a group of disorganised songs and not worry about FixTunes changing songs that you know are fine.
Another good option is the ability to choose which details it fixes. This is great because I personally like to let FixTunes sort out any mistakes in Artist, Album and Name, and then use iTunes to add the artwork. This is because I prefer the way iTunes doesn't embed the artwork in the song file, but instead stores it in a separate database to save space and keep things more organised.
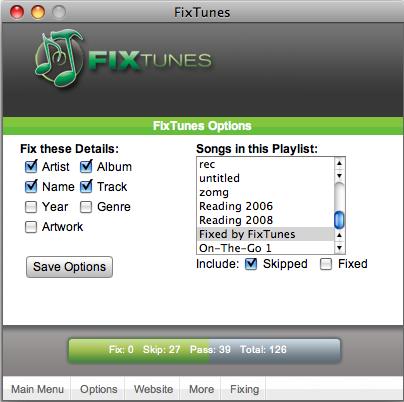
I can see FixTunes being a real timesaver if your iTunes library is made up largely of music from "other sources" rather than CDs or the iTunes store. If your song tags are a complete mess, FixTunes will completely automate a process that could potentially take hours for a large library.
Competition
FixTunes normally costs $24.95, but you can win one of 10 free copies simply by answering the following question:
What is the current (Mac) version number of FixTunes?
a) 1.01
b) 5.41
c) 14.2
Once you know the answer, head over to this page to enter.
Create a disk image that works in Windows
Disk images have far more widespread uses than this though. They can be used to create a exact copy of any CD, DVD or hard drive and turn it into a single .dmg file. You can then transfer this file around, and then simply double-click on it to mount the disk image. The most common uses of this are to create backups, to create a file for burning to CD/DVD, or to transfer the entire contents of a hard drive from one computer to another.

Unfortunately, the dmg type disk images that Mac OS X uses are not really Windows friendly. The cross-platform standard for disk images is the ISO format. These can be created on your Mac, and can be read by any Mac or Windows PC. This is especially useful if you want to burn a CD or DVD and your Mac doesn't have a burner but your PC does.
The first step in creating an ISO image is to make a folder of all the things you want to be in your disk image. Next, open up Disk Utility, located in the Utilities folder in the Applications folder. In Disk Utility, choose "New... Disk Image from Folder" from the File menu, or hit Command-Shift-N. Choose your folder, and then select a name for your image. Choose "DVD/CD master" from the Image format pop-up menu, and leave the Encryption as none. Click Save, and you're almost done.
You have created an ISO image, but strangely Disk Utility gives it the .cdr extension instead of the standard .iso extension. To avoid confusing Windows PCs, just rename your image with the .iso extension and you're done.
If you already have a normal Mac .dmg disk image, it's just as easy to convert it to .iso using Disk Utility. Just select Convert from the toolbar or the Images menu. Use the same settings as above, and remember to change the file extension to .iso.

For those of you who love the command line, you can convert disk image formats using hdiutil. This has the benefit of not requiring you to change the extension, but probably won't work out any quicker as the process is so straightforward in Disk Utility.
To convert from DMG to ISO, open up Terminal (in Applications/Utilities) and type:
hdiutil convert /path/to/image.dmg -format UDTO -o /path/to/newimage.isoReplace the two paths with the location of the image and the place you want to save the new image. For example I would use /Users/matt/Desktop/image.dmg. To avoid mistakes, you can just drag the image to the Terminal and it will enter the path for you.
To convert from ISO to DMG, just use the following instead:
hdiutil convert /path/to/image.iso -format UDRW -o /path/to/newimage.dmgData Detectors in Mail
To use the data detectors feature, simple hold your mouse over a date or time in an email message. A dashed box should appear around the item, with an arrow that you can click to bring up a drop-down menu. The two options available are "Create New iCal event" and "Show This Date in iCal". If you create a new event, a dialog box just like the one in iCal pops up, ready filled with the information. This all happens within Mail, so there is no need to even open iCal.

While this is a great timesaving trick, unfortunately the Mail dialog lacks some of the features that the iCal one has. You can only add a single alarm, and you can't add attendees or attachments. However, it is still possible to use data detectors to fill out your event information and have access to these more advanced options.
Simply hold down the Option (alt) key when clicking on the data detector drop-down arrow. The menu item should now read "Create New Event in iCal". Selecting this will load up iCal and create a new event with the information in the Mail message.
If you already started creating an event in Mail, and then decide you want to add multiple alarms or attendees, simple hold down the Option (alt) key. The "Add to iCal" button at the bottom should change to "Edit in iCal", allowing you to make the changes you want.
Enable Data Detectors in iChat
Apple also built data detector functionality into iChat, but chose to disable it for some reason. Luckily, enabling it again can be done by a simple Terminal command. Start by opening up Terminal (/Applications/Utilities). In the window that appears, paste the following line, and hit enter.
defaults write com.apple.iChat EnableDataDetectors 1Next time you open iChat, data detectors should be enabled. To disable them again, repeat the command with a 0 at the end instead of a 1.
Disable Data Detectors in Mail
If you never use data detectors, you might want to disable them. This can be done using the following Terminal command:
defaults write com.apple.mail DisableDataDetectors YESNext time you open Mail, data detectors shouldn't appear. If you want them back, just repeat the command with NO at the end.
Text to Speech in Mac OS X
Since Mac OS X 10.4 Tiger, the amazing operating system has included many built in things. One of the many great things included with Mac OS X is called TTS (text to speech). I'll be covering an easy way to dive into text to speech. All you have to do is fire up Terminal.app (/Applications/Utilities/Terminal.app) and type in:
say 'text to say with no quotes'So if you type in:
say Hello WorldAnd hit return, then (as long as your speakers are turned on) your computer will 'say' hello world to you! A more advanced way to do this is to type in:
osascript -e 'say "some text" using "some voice"'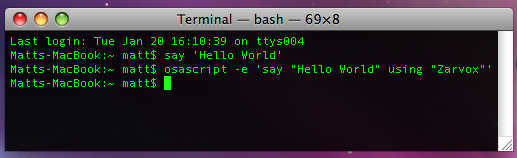
You can check the voices your system has in System Preferences in the Speech pane under the Text to Speech tab. You might have to select “Show more voices” at the bottom to get the full list.
[Matt adds: For any Cocoa application (Safari, TextEdit, etc.) there is a "Start Speaking Text" option under the Services menu (in the Application menu) that will speak your selection in the currently selected system voice. Great if you want a web page or long piece of text read to you. You can even assign a keyboard shortcut to it in the "Keyboard and Mouse" section of System Preferences. Also, since Leopard, Apple has added a new voice, Alex, which is much more realistic than the usual "robot" sounding voices that are available.]
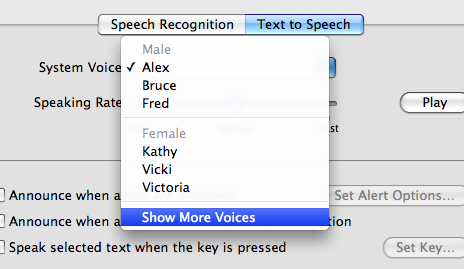
Split your iTunes library between two locations
The obvious way around this is to store the iTunes library on an external hard drive, which can be done quite easily by moving the "iTunes Music" folder over to the new drive and selecting the new location in the Advanced section of iTunes Preferences. However, this would mean that I wouldn't have access to my music when I’m moving around without the (not very portable) external drive.
An ideal solution for me would be to split my iTunes library between the two locations, storing large files like movies on the external drive and keeping the rest on my MacBook so I can access it at all times. The way to do this isn't entirely obvious, but luckily it is pretty straightforward.
The first step is to move the large files over to the external drive. You will find the movies folder in
~/Music/iTunes/iTunes Music/Movies. Just drag this folder over to the external drive, and delete the copy on your Mac. You can do the same with any music files too, but you will have to organise them into folders on the external drive yourself.Next time you open iTunes, try playing one of the movies. It will give an error saying the file couldn't be found and would you like to locate it. Now you can just point iTunes to the new file on the external hard drive.
Of course, this process would be really annoying to have to do multiple times for loads of movies, so here is a quicker method. First, remove all you movies from the iTunes library by selecting them in iTunes and pressing delete. These are just references to files that don't exist anyway, so you aren't really deleting anything. Now we want to add all the movies files back into the library, without copying them across from the external hard drive again.
Many of you may have noticed that there is a "Copy files to iTunes Music folder when adding to library" option in the Advanced section of iTunes preferences. We want to turn this off for the movie files on the external drive, but leave it on for all other files we add to our iTunes library. Checking and un-checking this box each time we want to add a movie to our iTunes library would be really tedious, so here is a quicker way.
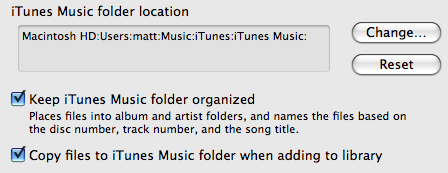
Simply hold down the option (alt) key while dragging the movie files onto the main iTunes window. That way, they will be left on the external drive and not copied back to your Mac. You can even do the whole folder in one go. Of course, if you don’t hold the option key, iTunes will behave in the normal way, allowing you to keep your music neatly organised in the iTunes Music folder.
Remember though, whenever your external hard drive isn't connected, you will get the "original file cannot be found" error if you try and play a movie in iTunes. Don't worry, as soon as you plug the external drive back in, all the movies will work again. Conveniently, movies synced to your iPod or AppleTV won't be deleted if you sync while the external hard drive isn't connected, but obviously you won't be able to add new movies to the iPod or AppleTV until you plug in the external drive again.