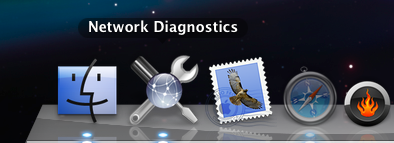
Diagnostics on the Dock
One of the great features of Safari on the Mac is the way it handles a network outage. If youre somewhere with an unreliable connection, say because youre using a distant wireless network (or if like me you live in Africa), then Safari will give you a message if it can’t connect to the internet with a button to click to open the network diagnostics window. What’s more, it automatically loads pages if the network becomes reconnected.
The diagnostics window is great because it gives you clear red/green indicator lights that show whats working and what isnt so you can quickly diagnose connection issues and find out whether its something wrong with your computer or with the network.
But what if your favourite browser is Firefox or if you have to deal with tricky or unreliable network issues without using Safari? Well, you dont need to go and use Safari, you can just open the Network Diagnostics application directly. The problem is, its not in the Applications or Utilities folder, its buried in
/System/Library/CoreServices. For a quick convenience diagnostics tool this is not so handy. To make the Network Diagnostics application more accessible, first navigate to
/System/Library/CoreServices. Look in this folder for Network Diagnostics, and drag it to the Dock. Now, whenever you have problems connecting to the internet via an application other than Safari, you can simply click on the icon in the Dock to find out what’s wrong.If you dont like a whole dock space being taken up with it, then you could make a shortcut to the application and add it to a folder of other applications stored in a neat stack at the documents end of the dock.
Custom Genre Artwork in iTunes 8 Grid View
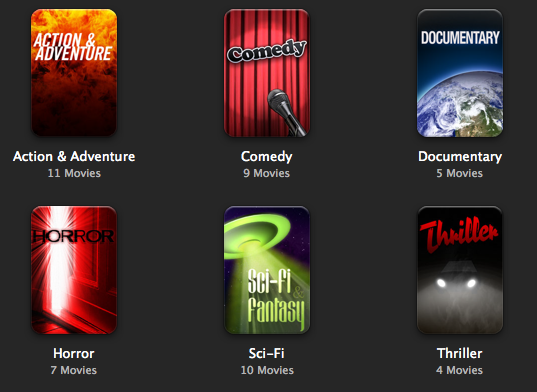
If you aren't happy with the artwork provided, or you want to add your own genres, you can do this fairly easily by adding an image to the iTunes package, and then editing a plist file to pair it to the genre. Here's the step by step process.
Start by going to your applications folder and finding iTunes. Right-click (Control-click) on it, and choose "Show Package Contents" from the menu. In the folder that appears, navigate to the Resources folder. This is where you will find everything you need to change.
All the jpg images with names like genre-XXXXX.jpg are the artwork files. Note that all the movie ones end in M, and ones especially for TV Shows end in T. If you want to edit one, hold the option key and drag it to your desktop to copy it there. Once you are done editing, save the file to the desktop and the drag it back to the Resources folder. I would suggest you don't replace the old image, just in case you want to go back to it. Simply rename the old one to oldgenre-XXXX.jpg or something similar.
If you want to create your own genre artwork, note that all the movie genres are 171px x 256px and all the TV show and music genres are 256px x 256px. If you create artwork that isn’t the right size, iTunes will automatically scale it for you anyway, so you don’t need to worry about this too much. Also note that you don't have to round the corners yourself, iTunes does this for you. When copying the file to the iTunes resources folder, make sure to give it a name different from any existing genre images.
If creating your own isn't your thing, a quick search on google brought up a flickr group containing artwork others have created.
The next step is to get iTunes to use your image automatically when you use certain genres. In the Resources folder, look for the file genres.plist. Before we make any chages to this file, you might want to back it up. Once you've done this, open it up in TextEdit (Right-click and choose Open With TextEdit). This will pretty much look like nonsense to anyone unfamiliar with plists, but don't worry. You will notice that most of the file is made up of the following lines, repeated over and over again:
<dict> <key>matchString</key><string>action</string> <key>resourceFile</key><string>genre-actionM.jpg</string> <key>kind</key><string>movie</string></dict>This one looks out for any "movie" with the genre "action" and gives it the image "genre-actionM.jpg". You may notice that some other ones are slightly different. Most TV show and music genres don't have the final line. The one that does is the TV show genre "Classic" which also has the line
<key>exactStringMatch</key><rue/>. This is to make sure it doesn't get mixed up with the music genre classical.Say, for example, you created some genre artwork for Gothic Rock, and called it genre-gothicrock.jpg. After the last
</dict> in the file, you would write:<dict> <key>matchString</key><string>Gothic Rock</string><key>resourceFile</key><string>genre-gothicrock.jpg</string></dict>For movie genres you would also include the line
<key>kind</key><string>movie</string>.Save the file, the quit and re-open iTunes. If everything worked, your genre artwork should show up in grid view. If it doesn't, the most likely problem is typos in the genres.plist file.
One more thing to note is that you might lose your changes when iTunes updates. You might want to keep a backup of your new jpg artwork images and the genres.plist file in a separate place as items within the package contents are often replaced when the application updates.
Get the most out of your laptop battery
Over time, your battery holds less and less charge, meaning your laptop doesn't last as long between charges. Apple claims that their batteries are designed to retain 80% of their original capacity after 300 cycles.
You can check how many cycles your battery has done by looking in System Profiler. You can find this by clicking on the Apple menu in the top left and choosing About This Mac. In the window that appears, click the "More Info..." button. In the sidebar of System Profiler, click on Power to bring up all the details about your battery. The interesting part is the Health Information. (Note that the stats shown below are for a fairly new battery).
Charge remaining (mAh): 4940
Fully charged: Yes
Charging: No
Full charge capacity (mAh): 4940
Health Information:
Cycle count: 21
Condition: Good
If it says "Check Battery" under Condition, there is likely a problem with your battery. The good news is that if the cycle count is under 300, Apple are likely to replace the battery for free. If your laptop is under one year old, they will almost definitely do so. However, before seeking out a new battery, make sure to completely charge and discharge the battery at least one to check it is not a temporary problem.
If your battery is in good condition or is starting to show signs of aging, you will want to make sure you get the most out of it before you have to replace it. Here are a few tips to prolong the lifespan and battery life of your battery.
The best way to use your laptop on a day to day basis is to keep it fully charged as much as possible (i.e. plugged in), but run down the battery fully at least once per month. This is because it is important to keep the electrons inside moving occasionally. Doing this will make sure that your battery will continue to recharge to the maximum capacity for as long as possible.
To get the longest possible battery life, you should use your laptop between 10° and 35°C (50° to 95°F). More importantly, when storing your laptop you should keep it between -25° to 45°C (-13° to 113°F) even if you are not using it.
If you are going to store your laptop for a long time, Apple recommends you remove the battery from the laptop and store it at 50% charge. If you leave it fully charged or fully discharged you may find the battery loses a lot of capacity.
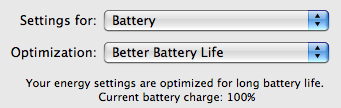
A simple method that can make your battery last a lot longer between charges is to tweak your System Preferences. Firstly, go to the Energy Saver Pane. Here, make sure the optimization menu is set to Better Energy Savings for when the laptop is powered by the battery. This will put the hard disk to sleep whenever possible, and reduce the laptop's CPU performance.
One trick that I often use if I am trying to squeeze an extra half an hour out of my battery is to reduce the brightness of the display. The simplest way to do this is to use the F1 key (F2 will increase the brightness again). Dim the screen to the lowest comfortable level, which should be pretty low especially if you are indoors.
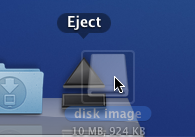
You might also want to eject any CDs or DVDs you aren't using, quit as many applications as possible, disconnect any unused peripherals and turn off Bluetooth and Airport.
10 tips for Stickies
If you aren't familiar with Stickies, you'll find it in the Applications folder. Once opened, it will display a number of differently coloured "notes". You can write in each of these, and any that you leave open when quitting will still be there next time you open up Stickies.
Here are 10 tips for getting the most out of Stickies.
1. Make Stickies float above all windows
With the note you want to float selected, press Command-Option-F. This will cause the Sticky note to appear above all other windows no matter which application you are in. This is great if you are switching between multiple windows and application while writing or referring to a single sticky note. If you can't remember this keyboard shortcut, you'll find the command in the Note menu.
2. Make Stickies translucent
If you look in the Note menu, you will also see an option for a translucent window, with the keyboard shortcut Command-Option-T. This goes well with the floating window option, as it stops the floating sticky note getting in the way too much.
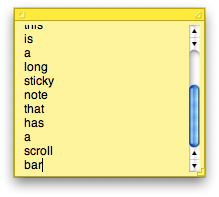
3. Add scroll bars to Stickies
This one might just be for the pros, as it is a bit tricky and requires you to have the Developer Tools installed (find them on your Mac OS X Install Disc).
One thing that may annoy you is the inability to quickly scroll through long notes, as you have to use the arrow keys to move through the text line by line. The way to fix this is to modify the Stickies application by using Interface builder to add scroll bars to the side of long Sticky notes.
First make sure Stickies isn't running, and make a backup of it by holding the option key and dragging it to another folder (just in case anything goes wrong). Next, right-click (Control-click) on the Stickies icon and choose "Show Package Contents" from the menu that appears. Inside the contents navigate to Resources/English.lproj and double click on StickiesDocument.nib to open it on Interface Builder.
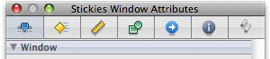
If you are using Interface Builder for the first time, welcome to the wonderful world of how applications are made. A window called StickiesDocument.nib should be open. In this window there are a number of icons with various names including "File's Owner" and "First Responder". Double-click on the icon called "Window" which should open up a mostly empty, white window called "Stickies". Also, open the Inspector by pressing Command-Shift-I or by choosing it from the Tools menu.
 -->
-->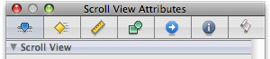
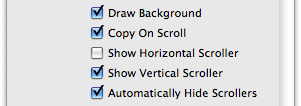
The title of the Inspector window should be "Stickies Window Attributes". Clicking ONCE on the Stickies window will change the title of the Inspector window to "Scroll View Attributes". Amongst the options in the inspector, you want to check the checkbox that says "Show Vertical Scroller" and the checkbox that says "Automatically Hide Scrollers".
That's it, you're done. Save the file (Command-S) and quit Interface builder. Next time you open Stickies, long Stickies notes should have scroll bars.
There are a lot more things you can do to modify Stickies using Interface Builder, but they are beyond the scope of this tip. If you want to do more, check out this old article on Modifying Stickies. Note that it uses an old version of Interface Builder, so a lot of the screen shots and descriptions are different to the current version.
4. Place other media in Stickies
Not many people know that the contents of Stickies is not restricted to text. You can put almost anything in them. Dragging a Quicktime movie onto a Sticky note will embed the movie in the note, complete with the usual play/pause controls. You can do the same for images and PDFs too. Sometimes Stickies will ask if you want to create an alias rather than a copy of the file within the Sticky. An alias will stop your Stickies database getting too big (especially with movies) and will mean that the contents of the Sticky will automatically be updated if the embedded file is updated.
5. Back up your Stickies library
If you use Stickies a lot, or you keep any important information in your Sticky notes, it is worth keeping a backup of the Stickies database in case anything goes wrong. All your Stickies are stored in one file that, as noted above, is fairly small unless you have embedded lots of movies in your notes. The file is named StickiesDatabase, and is located inside the Library folder in your user folder. Simply create a copy of this file somewhere else to make a backup.
6. Change default new note settings
To set the default font, text size, note size, note colour and translucency, create a new note and customize it to what you want. Then choose"Use as Default" from the Note menu. You can change even more settings by editing the Stickies preferences plist. Go to your user folder and navigate to Library/Preferences and find com.apple.Stickies.plist. The most interesting thing here is the WindowFlags item. Setting it to different values gives the following default notes:
0 - standard Sticky note
1 - minimized note (just title bar)
2 - floating note
3 - floating minimized note
4 - translucent note
5 - translucent minimized note
6 - floating translucent note
7 - floating translucent minimized note
7. Search
Using Command-F you can search for words in a single note or all notes. You can also perform a Find and Replace.
8. Dashboard Stickies
If you frequently use the Dashboard, then the widget version of Stickies might be more useful for you than the application version. Note that you can create as many different sticky notes as you want, simply by dragging another one up from the bottom bar. You can also change the fonts and colours by clicking the i button, however you are more limited than in the Application version.
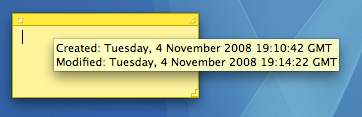
9. Discover a Sticky note's creation and modification dates
This is a simple one - just hold your mouse still over any part of a sticky note to see a tooltip containing the Creation and Modification dates and times of the note.
10. Create a Sticky note from selection
Due to the Services menu in Mac OS X, you have access to Stickies whatever application you are in. Simply select any block of text anywhere and hit Command-Shift-Y to create a Sticky note with that selection.
To be honest, this is quite possibly the most powerful feature of Stickies. Never mind the ability to embed movies and have translucent windows. Being able to create a quick note of any text with one keyboard shortcut is the easiest and most useful aspect of Stickies there is.
Control the visualizer in iTunes 8
Like the previous visualizer, you also have the ability to control this one. While the visualizer is running, hit the ? key to bring up a list of available functions. They are as follows:

? - Toggle help screen
M - Change mode
As far as I can tell there are 8 or 9 different patterns.
P - Change palette
Changes the colours used.
I - Display track info
Displays information about the current song.
C - Toggle auto-cycle (on by default)
Turns on or off automatically cycling through modes and colours.
F - Toggle freeze mode
Freezes the visualizer while the camera continues to pan around.
N - Toggle nebula mode
Turns on or off the clouds in the background.
L - Toggle camera lock
Holds the camera still while the visualizer continues.
Add Spacers to the Dock
If you want to divide the applications in your Dock into groups, the best way is to add spacers. A common method is to create “fake” applications with an invisible icon to fill the space, but that is a bit inelegant. A much better way, available in Leopard, is to use a Terminal Command. Each time you run the command it inserts a blank "space" into your Dock, which you can then drag around to where you like.
Start by opening up Terminal, located in Applications/Utilities. Type the following line and then hit enter:
<code>defaults write com.apple.dock persistent-apps -array-add '{tile-data={}; tile-type="spacer-tile";}'</code>
For the changes to take effect you will have to restart the Dock, either by logging out and in again or by running the killall Dock command in the Terminal. The spacer appears at the end of the icons that are permanently in the Dock. You can then drag it along to where you want it.

The above command inserts the spacer on the applications side of the Dock. To insert a spacer on the right hand side, use the following command:
defaults write com.apple.dock persistent-others -array-add '{tile-data={}; tile-type="spacer-tile";}'
As always, you will have to run killall Dock for changes to take effect. To add multiple spacers just run the command again and again. Note that you can use the “up” arrow in terminal to automatically enter the last run command.
If you want to remove a spacer, treat it like any other icon in the Dock. Either drag it off and let go to get a nice puff of smoke, or right-click on it and choose Remove from Dock.
Make the Dock appear when it refuses to show
Simply use the keyboard shortcut Command-Option-D, which turns on/off Dock hiding. You don't even have to stop dragging your icon to do this, and it works whatever application you are in.
Next time the Dock fails to appear, while still dragging your icon, simply hit Command-Option-D and the Dock should spring up. Drop your icon onto the trash (or eject icon, or whatever you want), and then just hit Command-Option-D again to make the Dock disappear again.
Change the default text for pretty much anything in OS X
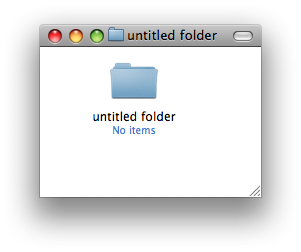
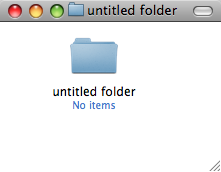
Change the default new folder name
First, navigate to Macintosh HD/System/Library/CoreServices. In here, locate the Finder application. Right-click (Control-click) on it, and choose "Show Package Contents" from the contextual menu. In the window that appears, navigate through to Contents/Resources/English.lproj. A quick way of navigating here (you might end up doing it a few times) is to use the "Go to Folder" option in the Go menu. In the box that appears, paste the following line:
/System/Library/CoreServices/Finder.app/Contents/Resources/English.lproj/Find the file named "Localizable.strings" and drag it to the Desktop to make a copy. We are going to edit this copy on the desktop, and then copy it back into the English.lproj folder to replace the original version. You might want to make an additional copy of the file as a backup, just in case anything goes wrong.
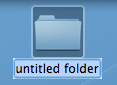
Open up the desktop version of the localizable.strings file using TextEdit. Scroll down to the line that starts with N2. it should say the following:
"N2" = "untitled folder";Now you can change the words "untitled folder" to anything you want. For something at the start of the alphabet, you could simply put "*untitled folder*".
Once you are done, save the file on the desktop and quit TextEdit. Finally, drag the file back to the English.lproj folder that you copied it from. Click Authenticate and type in your administrator password.
For changes to take place, you will have to relaunch the Finder, which can be done by holding down Control and Option, clicking the Finder icon in the Dock, and choosing Relaunch from the menu.
Suffixes for duplicates and aliases
These are done in exactly the same way as the new folder tip above. Only this time, change line N3 for aliases, or N4 for duplicates.In these cases, "^0" takes the place of the original file name. So, for a duplicate, the default is "^0 copy", meaning the duplicate of "file.doc" is "file copy.doc". As above, you can change this to anything you want. "copy of ^0" would mean the duplicate would work better with file extensions, giving "copy of file.doc". However, it wouldn't be next to the original file alphabetically.
Remember to relaunch the Finder when you are done.
Shorten the Finder's 'Show Item Info' text
One of the features I like about Mac OS X is the "Show item info" check box located in the View Options of the Finder. This works for all windows in icon view, and is therefore especially useful on the desktop. However, one problem with it is the text for Hard Drives is too long, unless you make the text size really small.You can solve this problem by editing the same localizable.strings file as above. Carry out the steps exactly the same, but search for the line "IV9" = "^0 free";. The best way to change this is to get rid of the word free, just leaving "IV9" = "^0";. You can see the result below.
Remove default Genres in iTunes
iTunes comes with a long list of genres, some of which many people will never use. Occasionally this may become annoying, for example when using the autofill feature.To remove some of the genres, you have to edit the localizable.strings file within iTunes, rather than within the Finder. You can find this by going to iTunes in the applications folder, right-clicking and choosing "Show Package Contents". In here, navigate to Contents/Resources/Englihs.lproj where you will find the localizable.strings file. As before, you will have to copy it to your desktop before editing.
Open up the file in TextEdit. You'll find the list of genres under the line
/* ===== Genres ===== */. To remove a genre, don't bother deleting it, just in case you ever want it back. Simply "comment" out the line, by putting a /* at the start, and a */ at the end. For example, to remove Techno, you will simply replace the line with /* "9200.019" = "Techno"; */.As always, quit and reopen iTunes for changes to take effect.
Change the iTunes sidebar labels
The most obvious reason for wanting to do this is if you would prefer the labels to be lowercase. Using the same localizable.strings file as in the genre tip above, find the following lines:"135.011" = "LIBRARY";
"135.012" = "DEVICES";
"135.013" = "STORE";
"135.014" = "PLAYLISTS";
You can change these to anything you want, or simply remove the capitalization.
Change the Finder's sidebar labels
You can do exactly the same thing in the Finder's sidebar. The file you need to edit is localizableCore.strings, located in exactly the same place as the localizable.strings file inside the Finder application. The lines you want to change are the following:"SD5" = "DEVICES";
"SD6" = "SHARED";
"SD7" = "SEARCH FOR";
"SD8" = "PLACES";
Customize System Preferences
All the System Preferences panes are grouped into five categories - Personal, Hardware, Internet and Network, System and Other. It is quite easy to change these category names by going inside the System Preferences package, which is in the Applications folder. Inside it, navigate to the English.lproj folder inside the Resources folder. In here, find a file named NSPrefPaneGroups.strings and drag it to your desktop. Now open this file up in TextEdit and you'll see the following lines:"personal" = "Personal";
"digitalHub" = "Digital Hub";
"hardware" = "Hardware";
"net" = "Internet & Network";
"system" = "System";
"addons" = "Other";
Don't change the words on the left, these are the ones used by System Preferences. You can change the words on the right. These are the ones displayed in the System Preferences window. Just make sure you don't delete any quotes or semicolons. Also, ignore the "Digital Hub" entry. This isn't used anymore and is probably just left over from a previous version of the operating system.
Now save the file and drag it back to the English.lproj folder from the Desktop. You will have to Authenticate this action with your administrator password.
Dock Menu items
For a bit of fun (I can't see why else) you can change the items in the menus you get when right-clicking on icons in the Dock. The Dock application is located in /System/Library/CoreServices. Right-click on it and choose "Show Package Contents". In the window that appears, navigate to Contents/Resources/English.lproj where you will find DockMenus.strings. Copy this file to the desktop to edit it.Some of the lines you might want to edit are the "Application Not Responding" and "Force Quit" lines to something more reflective of the feeling you get when you see them.
Change Unexpectedly Quit message
With some tinkering it is possible to customize Mac OS X alert messages and dialog box text. For a bit of fun, you can change the message that appears when an application crashes to something more humorous.Open up your hard drive and navigate to /System/Library/CoreServices. Find the Crash Reporter package and open it by right-clicking and choosing Show Package Contents.
In the window that appears, navigate to Contents/Resources/English.lproj and find Localizable.strings. Copy it to your Desktop and open it up in TextEdit. Near the bottom of the file you will see the line -
/* Unexpectedly quit dialog */
In the lines that follow this it is fairly obvious how to change the message. The symbol "%@" will make the message display the crashed Application's name, and "\n" will make a line break. Save the file and then copy it back to the package to replace the old version. You will have to enter your administrator password.

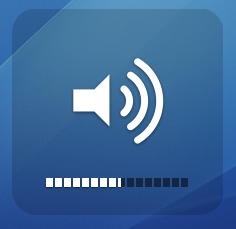
Volume Change Shortcuts
Holding down the Option key while pressing one of the volume change keys will bring up the Sound System Preference pane. Here you can change the alert sound, alert volume, and when different sound effects are played. You can also change the sound input and output, incase you have an external microphone or speakers.
Holding down the Shift key when pressing the volume keys will disable the sound that is normally played when you change the volume. You can disable this permanently from within the Sound Preference Pane by un-checking the box "Play feedback when volume is changed". Now, when you hold shift it does the opposite, temporarily enabling the volume change sound.
Unfortunately, this one is Leopard only. If you hold down both Option and Shift while pressing the volume keys, you can change the volume more accurately. The entire volume spectrum is divided into 65 instead of the usual 17 (by my count). This means you can adjust the volume by just a tiny amount if it is not quite right.
To disable the startup sound that plays when you turn on your mac, simply hold down the mute button while pressing the power button. Keep it held down for a while, until after the sound would have normally played.
The Ultimate Mac Screenshot Guide
Keyboard Shortcuts
The quickest way to take a screenshot is to use a keyboard shortcut. Annoyingly, these aren't particularly intuitive. There are two main ones:Command-Shift-3 - Take a screenshot of the entire screen.
Command-Shift-4 - Allows you to click and drag around the area you want a shot of.
Each of these will save a file to the desktop named Picture 1.png, or a higher number if that file already exists.
Now there are a few extra things you can do. If you press Space after pressing Command-Shift-4, you will notice that the cursor changes to a picture of a camera. You can now just click on a window, icon, widget or almost any other interface element to take a screenshot of it. You can also add Control into the keyboard shortcut to put the image in the clipboard instead of saving it to the desktop. For example, pressing Command-Control-Shift-3 would allow you to then paste the image into another document.
The Grab Application

You can create a timed screenshot by going to the Capture menu, or by pressing Command-Shift-Z. Using this, you can achieve screenshots that are supposedly “impossible”. One example is the login window.
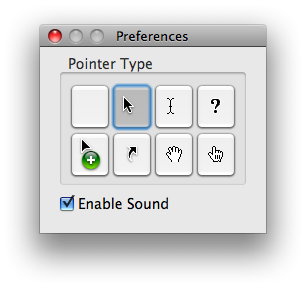
To change the pointer type, go to the Preferences. See the image below for the different options.
Disable Shadow
If you use the Command-Shift-4 Space method to take a screenshot of an entire window, you will find that the shadow is in the screenshot. This was added in Leopard because without the shadow, windows don't actually have a border if they have no scrollbars. However, if you prefer no shadows, you can disable them with a Terminal command. Simply open up Terminal (located in Applications/Utilities), paste in the following line and hit return.defaults write com.apple.screencapture disable-shadow -bool trueAfterwards you will need to log out and in again for changes to take effect. To enable shadows again, simply repeat the command but with false at the end. The two images below show a before and after shot.
Change Image Format
The default image format for screenshots is png, which gives a nice, high quality picture. However you can change this if you want. As before, use the following Terminal command:defaults write com.apple.screencapture type pngSimply replace png with your file format of choice. The available options are jpg, tiff and pdf. Changing to jpg gives a lower quality but smaller file. Some people prefer this for quick snaps, but others dislike the slightly blurry results it gives. As before, log out and in again for changes to take effect.
Advanced Screenshot Applications
If widgets are your thing, Screenshot Plus will probably be the method of choice for you. It's free, and allows you to do everything that you can achieve with keyboard shortcuts. It also allows you to view a preview image, before saving it to the desktop or importing it into Preview.If you really want to go all out on your screenshots, you might want to consider buying an application like Snapz Pro. It allows you to do all of the things above, as well as record movies of your screen.
Finally, if you want to get screenshots of long webpages that don't fit on the screen, Paparazzi! is your solution. It gives allows you to set the size of the image, set a delay, choose the file name and choose the file format. Of course, if you want a PDF of the web page, that functionality is already built into Mac OS X.

Also, the MacTipper Blog pointed out one more thing I forgot. Using another Terminal command, you can change the default save location to somewhere other than the Desktop. The command is as follows:
defaults write com.apple.screencapture location /Full/Path/To/FolderFor full instructions, check out the MacTipper Blog.
12 Hidden Firefox Settings
Even if you are a regular Firefox user, you still may not know about the advanced configuration options. To get these options, type
about:config into the Firefox address bar. Once you hit return, you get a warning because modifying these preferences can (in rare circumstances) cause strange behaviour.
1. browser.urlbar.clickSelectsAll
The default behaviour, true, means that when you click the address bar, it automaticall selects all. Changing this to false stops this, and just inserts the cursor where you clicked.
2. browser.tabs.closeButtons
By default, Firefox displays a close button on every tab. Setting this preference to 0 will only display a close button on the currently open tab. Setting it to 3 will move the close button to the far right end of the tab bar, and setting it to 2 will get rid of all close buttons.
3. browser.search.openintab
Double-clicking this will set it to true. This makes searches from the box in the top right open in a new tab rather than the current one.
4. browser.urlbar.maxRichResults
Determines the maximum number of results that drop down from the URL bar when you start typing. Default is 12.
5. browser.fixup.alternate.suffix
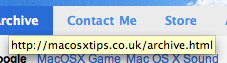
Allows you to change the suffix that is automatically added when you don't specify one. For example you might want to change this to .co.uk so you will be directed here if you only type www.macosxtips.
6. browser.tabs.loadFolderAndReplace
If you open a whole folder of bookmarks at once using "Open All in Tabs", they replace all of your open tabs. Setting this preference to false will cause the new tabs to only replace the current tab and add in the rest after it.
7. accessibility.typeaheadfind.casesensitive
Setting to 1 Makes the Find function (Command-F) case sensitive.
8. ui.click_hold_context_menus
Set this to true to enable the click-and-hold way to open contextual menus.
9. browser.tabs.tabMinWidth
If you open lots of tabs in Firefox, they shrink down so they all fit across the screen. After a certain limit, your tabs don't get any smaller and you have to scroll to the left and right to view other tabs. This preference allows you to set the minimum width. Default is 100, lower values will give smaller tabs.
10. browser.chrome.toolbar_tips
Setting this to false disables the yellow tooltips that appear when you mouse over the bookmarks bar.
11. layout.spellcheckDefault
Changing this value to 2 makes the spell checker work in all text boxes, not just the large text fields.
12. browser.backspace_action
This changes the behaviour of the backspace key. setting it to 1 makes the backspace key scroll up a page in the current window. Shift-Backspace will scroll down. 2 to make the backspace key do nothing. Except delete when text is selected, of course. Changing to 0 will change back to the default behaviour of going back a page.
Of course there are hundreds more hidden settings in this list, including ones for extensions you have installed. If you know any more, add them in the comments.
Add content to every page in Pages
Often on Mac forums users ask how to put watermarks in their Pages documents without having to copy and paste them on every page. Doing this for headers and footers doesn't present a problem, as Pages provides you with a neat little box to place content for every page. Here's how to do it for any media, anywhere on the page:
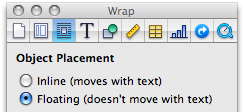
1. Arrange the media you want as a watermark (or text box, shape or image) as you want it on one of the pages. The only limitation to this method is that they cannot be inline objects. To ensure they are floating, select the objects and go to the "Wrap" tab in the inspector and use the radio buttons to correct this setting to "Floating".
2. With the watermark object selected, open the Format menu, go down to Advanced, and select "Move Object to Section Master". This deselects the items and displays them on every page in your document.

You will notice that you now cannot select these objects. If you need to move them around go to the Format menu, then select "Advanced > Make Master Objects Selectable". This lets you treat them as normal objects, though locking them is often useful as it prevents accidental modification.
5 Commonly Overlooked System Preferences
Number 5 on the list, smooth scrolling, is something I have never noticed before. You can find it in the Appearance section of System Preferences. When enabled, it means that pushing page up/down or hitting space bar makes the page glide instead of jumping straight to the next position. This small feature is fantastic when reading long web pages or news feeds, as you can just tap space to scroll down a page while keeping a good idea of where you are on the page.

The other 4 overlooked preferences are a bit more well known, but are probably still pretty useful for newer users. Head over to mactips.org for the full article.
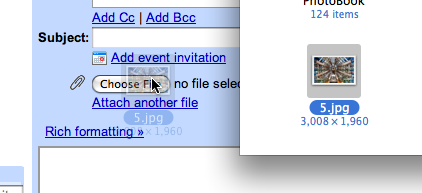
Drag and drop onto "Choose File" buttons in Safari
Simply drag your file from the Finder, hold it over the button and then let go.
Reset a lost OS X account password in single user mode
Remember, only use this if you have lost the Mac OS X install DVD. Also, don't do this if you have FileVault enabled in your account, and note that this will not change your keychain password.
First, we need to restart in Single User mode. To do this hold down Command-S while the computer is starting up. A command line prompt should appear on the screen instead of the login window or your normal desktop.
At the prompt, type
mount -uw / then return. Next, type launchctl load /System/Library/LaunchDaemons/com.apple.DirectoryServices.plist then return. You will need to type these exactly the same, so write them down beforehand.
The next step requires you to know the short username of the account. If you don't know this, type
ls /Users followed by return, and look for it in the list that appears.Next, type
dscl . -delete /Users/username AuthenticationAuthority followed by return. Make sure you replace username with the short username of the account.The final command to type is
passwd username followed by return. As before, replace username with the short username of the account.The rest is self-explanatory. Type the new password, followed by return. When prompted, retype the password.
Finally, type
reboot and hit return! Your password should be reset.Let Stacks keep your Dock tidy
Just as desktops get cluttered because they're handy, and an easy place to put and find things, the Mac OS X Dock gets easily cluttered with every application that you might want to launch at the click of a button. A cluttered dock means it may take so long to find the (tiny) icon you're looking for that you may as well have opened your application folder and searched through. But come to mention it, the Applications folder gets rather cluttered too. You can move things around, but so many programs assume that Safari and other standard applications will be sitting right there in the Applications folder. Is there a better way to group applications sensibly, without using any special software?
With Leopard's new Stacks feature, I believe there is.
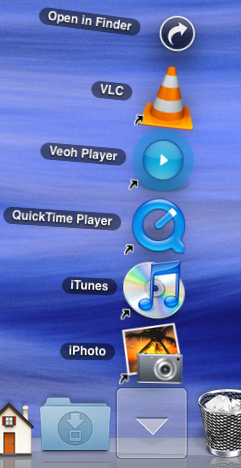
2. Then create theme-based folders for every other application you want close at hand. A stack is just a folder dragged onto the Dock, so we'll create the folders first. Create folders somewhere, like your Applications folder or Documents folder. I have folders for 'Utilities', 'Internet', 'Media', and document creation.
3. Fill these folders with aliases of the appropriate applications. Do this by holding the Command and Option keys as you drag a file from the Applications folder to put an alias/shortcut of that file in the destination folder, instead of moving or copying it.
4. When you have filled your theme-based folders, drag them onto the end of the Dock near the Downloads Stack and Trash (but not IN the Trash!) In the past you would have had a bunch of identical folder icons there, but now the Stack takes on a conglomeration of icons from the contents of each folder.
5. Click once on a stack and it opens out quickly. Click once and you launch the application. Click the wrong stack by mistake? Just click the one you want without having to click the first one closed. It's one more click than having everything in the Dock separately, but since icons are grouped more logically and icons can be bigger, it's actually miles more efficient.
6. But what to do with the special Apple icons? Time Machine, Spaces, Dashboard and Expose all have Dock icons which are not normal applications. The good news is that you can get hold of them from the Applications folder and drop them in a Stack, then remove them from the Dock. After all, Time Machine is almost automatic, Spaces, Dashboard and Exposé can be triggered from the keyboard more conveniently anyway (with the F8-12 keys) so they're just extra clutter. But it might be nice to keep the icons around.
NB: You do lose a little functionality that the Dock icons provide in their contextual menus if you follow this method, but nothing really significant in my eyes. Control-click on the dock icons before you delete them and see if you'd really miss any of the functions there. Since 10.5.2 there's a Time Machine menu item now, which gives you back any functionality lost with the demise of the Dock icon. That seems to make more sense anyway.
Finally, you can control-click on the stacks to change the order the icons are sorted, which may be helpful, and affects the order of the conglomerate icon visible on the Dock.
Enable Single Window Mode in Safari
If you use Safari regularly, you may notice that certain links refuse to open in the same window. If a link is set to open in a new window, normally holding down Command while clicking it will make it open in a tab instead. However, in certain places (like Gmail messages) links open in a new window no matter what you do.

defaults write com.apple.Safari TargetedClicksCreateTabs -bool truePress return, and quit and reopen Safari. Now all links targeted for a new window will open in tabs instead. To change back to the normal settings, use the same command but with
false at the end instead:defaults write com.apple.Safari TargetedClicksCreateTabs -bool falseDon't forget there are loads of other tricks for Safari 3, such as enabling the web inspector and bookmarking all open tabs.
Temporarily change Dock magnification settings
If you normally have Dock magnification turned off, holding Control and Shift while moving the mouse along it will temporarily turn on magnification. As soon as you let go of the keys, the magnification will turn back off again.
The Dock will magnify based on the settings in the Dock section of System Preferences, which you can only change when magnification is turned on. As a result you'll have to turn it on, choose your preferred magnification level and turn it back off again.
The keyboard shortcut works the other way round too. If you normally have magnification on, holding Control and Shift will temporarily turn it off.
I'm not sure how useful this feature is, but it's interesting none the less.
New features in Open and Save dialogs
![]()
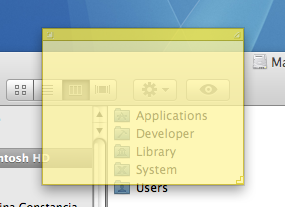
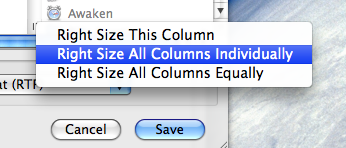
In column view, there is a new contextual menu for changing the column widths. Simply right-click (or hold Control and click) on the handle at the bottom of each column, and the menu will appear. You can choose from Right Size this Column, Right Size All Columns Individually and Right Size All Columns Equally. Strangely, this menu is unique to Open and Save dialogs, and doesn't appear if you right-click the column handle in a normal Finder window. In that case, you have to use the old method.

There are also a couple of new keyboard shortcuts for Open and Save dialogs. Command-I will open up the Get Info window on the selected item, and Command-R will show the item in the Finder. However for some reason, these don't seem to work all the time in Save dialogs.
Install hidden screen savers in Leopard
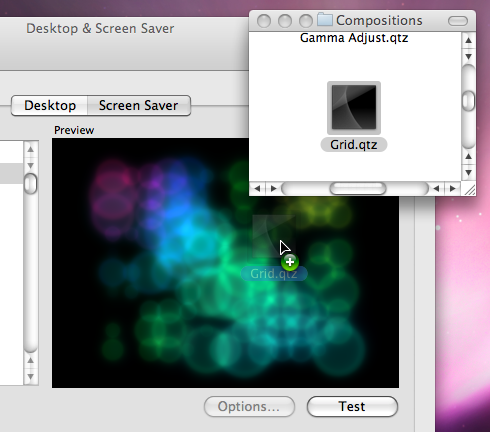
While those ones are automatically included as screen savers, there is actually a whole folder full of other compositions hidden in the system files. These files simply need to be dragged onto the Screen Saver section of System Preferences to install them.
To find these hidden screen savers, go to Macintosh HD, and navigate to /System/Library/Compositions. In here there are almost 90 Quartz Composition files. They aren't specifically made to be screen savers (it's actually a collection of iChat effects, slideshow transitions, image effects and iTunes visualizers) but some of them work just fine. When you find one you like, open up System Preferences and go to the Screen Saver section. Now just drag the file you have chosen onto the screen saver preview on the right. I have found that the following files work best:
Defocus.qtz
Fall.qtz
Floor.qtz
Grid.qtz
Image Hose.qtz
Kaleidescope.qtz
Moving Shapes.qtz
Stix.qtz
Travelator.qtz
Wall.qtz
Admittedly, Floor is pretty boring, and Stix is actually an iTunes visualizer, but they work none the less. Many of them allow you to change the options in from in System Preferences. For example, you have to choose an image for Kaleidoscope, or it will just display a blank screen.
There are even more compositions available in the Developer Tools. You can install the Developer Tools from the Mac OS X install disk. If you don't have the Developer Tools installed, it means you probably don't need them. It's overkill to install 2.5 GB of tools you will never use, just for a few screen savers. Instead, you can just install the examples. On the install disk, go to /Optional Installs/Xcode Tools/Packages and install DevExamples.pkg.
Take a look in /Developer/Examples/Quartz Composer/Compositions/Graphic Animations. Some of my personal favourites, "Scanner" and "Static" are in here. There are also two purpose built screen savers included with the Developer Tools, located in /Developer/Examples/Quartz Composer/Compositions/Screen Savers. "Retro" takes a picture of your current screen, gives it a sepia tone and bounces it up and down. "Security" takes pictures using your iSight and displays them in a grid. As with the other files, simply drag them to the screen saver preview in System Preferences to install them.
Move all Windows to the Main Display
Luckily, this blog post has the solution - a simple AppleScript. When run, it automatically finds all the windows that are off the edge of the screen and clusters them in the top left of the main monitor. To run it, start by opening up Script Editor (located in Applications/AppleScript) then paste in the following:
property processesToIgnore : {}
tell application "Finder"
set _b to bounds of window of desktop
set screen_width to item 3 of _b
set screen_height to item 4 of _b
end tell
tell application "System Events"
set allProcesses to application processes
set _results to ""
repeat with i from 1 to count allProcesses
set doIt to 1
repeat with z from 1 to count processesToIgnore
if process i = process (item z of processesToIgnore) then
set doIt to 0
end if
end repeat
if doIt = 1 then
tell process i
repeat with x from 1 to (count windows)
set winPos to position of window x
set _x to item 1 of winPos
set _y to item 2 of winPos
if (_x < 0 or _y < 0 or _x > screen_width or _y > screen_height) then
set position of window x to {0, 22}
end if
end repeat
end tell
end if
end repeat
end tell
Click the Compile button at the top to make sure the script is OK. If you receive an error message, check for any problems that may have occurred in the copy/paste process.
For the script to work, you will need to enable access for assistive devices. You can do this by going to the Universal Access section of System Preferences. Check the box at the bottom that says “Enable access for assistive devices”.
Now, when you click the Run button above the script, any off-screen windows will be placed in the top left of the main monitor.
One problem with this is that you may have some applications that keep windows off-screen on purpose. One example of this is Firefox, which gives you a blank square in the top left when you run the script. The first line of the script allows you to get around this by excluding specific applications from the script. For example you could change it to
property processesToIgnore : {"Firefox"}
or
property processesToIgnore : {"Firefox", "otherApp", "anotherOne"}
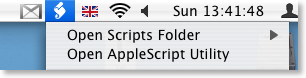
Now, opening up the script and clicking the "Run" button every time you disconnect your second monitor is quite time consuming. There are a couple of ways to run it much more quickly. The first is to add it to your scripts menu. If you haven't already enabled this, you can do so by navigating to Macintosh HD/Applications/AppleScript and opening up AppleScript Utility. Near the bottom of the window that appears, check the box that says "Show Script Menu in Menu Bar". To add your script to the menu, you have to save it in a specific location. Go to the Library folder inside your user folder and look for a folder called "Scripts". If it isn't there, create it. Save the script here.
An alternative way to run the script is to save it as an application. With the script open in Script Editor, go to the File menu and choose Save As. Change the File Format drop-down menu to Application and then save it. Now when you double-click the script, it will instantly run. Save it somewhere you can easily access it, like on the desktop.
Automatically Insert the Date and Time
How can I set my MacBook to insert today's date, short version or long version, into whatever I'm keyboarding in??? QuicKeys is too expensive for Mac OS X and this Mac should do that!
The best way to do this is using an application called WordService. You can download it for free from the Devon Technologies site.
To install it, create a new folder in your Library folder called "Services" and drag the the WordService.service file into it. Log out then back in again to enable the service.
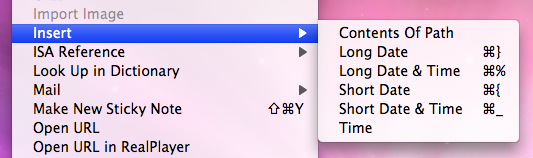
WordService is now accessible form the Services menu. This is under the Application menu in the top left, next to the Apple menu. You will probably have a lot of things in this menu, even if you have never installed any services before. This is because many applications will add things in that they think are useful. The new entries that WordService has added are Insert, Format and Convert. Each of these has a submenu with multiple options. The full features are outlined at the bottom of this page.
To insert the current date or time, you want to look at the options in the Insert submenu. There are different options for inserting the short date, long date, time and combinations of these. Each one has a keyboard shortcut to speed things up.
Inserting the date and time is just one thing WordService is capable of. One of the more fun features is the Rotate13 option in the Convert menu. This allows you to "encode" the selected text with a simple substitution cypher. You can also speed up many repetitive tasks like removing double spaces and setting all caps or lowercase.
WordService works in all Cocoa applications (TextEdit, Mail, Safari etc.) and many Carbon Applications. As a result, you can use it almost everywhere. One notable place where it doesn't work is in Microsoft Word. Luckily, all of the Microsoft Office applications have their own way to insert the date and time. You'll find it under the Insert menu.
Disable Tooltips in Safari and Firefox
Most of the time you can solve this by hitting return or enter. The tooltip should disappear. If you want to completely disable them, it is a little bit trickier. Annoyingly, tooltips are applications specific, so you have to enable/disable them in every application. Some applications have a preference to do this. Frustratingly, many do not.
defaults write com.apple.Safari WebKitShowsURLsInToolTips 0Then press enter. You will need to quit and reload Safari for changes to take effect. Repeat with a 1 at the end instead of a 0 to reverse this. Note that tooltips are disabled by default in Safari 3. You can use this to enable them.
If you want to disable tooltips in Firefox, start by typing
about:config into the address bar. In the list that appears, find browser.chrome.toolbar_tips. An easy way to find it is to start typing browser.chro into the filter box. Once you have found the item, double-click on it to change it from true to false. Now when you are browsing, tooltips should be disabled. Simply double-click again to change things back.Make the Most of Quick Look
Index Sheet
If you select multiple files before activating Quick Look, you'll just be shown a preview of the first file. There are buttons to flick forward and backward through the different previews, but much more interesting is the Index Sheet button. Clicking this is just like using exposé, only with the previews rather than windows. The previews will shrink down to show you them all in a grid. Clicking on one of the thumbnails will expand that one.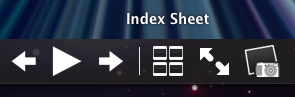
Plugins
Quick Look works with most file formats straight away, but for those that don't work there are plugins available. There's a great list of them here. In my opinion, one of the most useful is Folder Viewer. This makes Quick Look list the contents of a folder, instead of just showing a huge folder icon.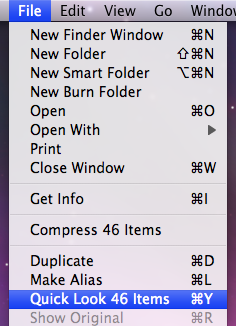
Other ways to activate Quick Look
There are many ways of activating Quick Look. The simplest and most well known is hitting the space bar, but there is also the official keyboard shortcut, Command-Y. If you would prefer to use the mouse to invoke Quick Look, you can add a button to the Finder toolbar that does just that. With a Finder window open, choose Customize Toolbar from the View menu and drag up the Quick Look button. Quick Look is also available in the File menu and in the Contextual menu that appears when you right-click on a file.Jump straight to slideshow mode
Some people have complained that the slideshow function in the Finder has disappeared in Leopard. Actually, it has just become a part of Quick Look. When using Quick Look on multiple images, there is a play button at the bottom to start a slideshow. However, there is an easier way to jump straight to slide show mode. Just add in the Option key to the activation methods listed above. Command-Option-Y will start a full screen slideshow, and if you hold Option when looking in the File menu you will see Quick Look has changed to Slideshow. If you have activated the toolbar icon for Quick Look, holding down option changes it to a play button that starts a slideshow when clicked.
Zooming
If you activate Quick Look on an image, there are a number of ways in which you can zoom. Hold down the Option key and you will notice that the cursor changes to a magnifying glass. Now, using the scroll wheel you can zoom in and out. Alternatively you can Option-click to zoom in. To zoom out, hold Option and Shift while clicking. For PDFs this method doesn't work for some reason. However, you can still zoom using the Command-- and Command-+ keyboard shortcuts.Keyboard navigation with Quick Look open
While you are previewing a file with Quick Look, you can still use the keyboard to navigate to other files. In column view this is easily done with the arrow keys. In the other views, use Command-DOWN and Command-UP to go into and out of folders.Examine Trashed Files
It is impossible to open files in the Trash without first moving them out onto the Desktop. So in the past, if you wanted to check through files before emptying the Trash, you had to get them all out first. Luckily, Quick Look works on items in the Trash, so you can quickly look through them to check if you are about to delete anything important.Use with Time Machine
Another great place to use Quick Look is with Time Machine. Once you've found a file you want to restore, verify it with Quick Look before clicking the restore button.Change Backspace Behaviour in Firefox
If that horror story sounds familiar, you might want to try changing the behaviour of the delete key in Firefox. Luckily, this is quite easy and doesn't require any Add-ons.
![]()
Start by opening up Firefox and typing
about:config into the address bar. After you press return, you should see a huge list of Firefox preferences that you can change. Start typing browser.backspace into the filter box at the top, until you see the item called Browser.backspace_action. Double-click on it, and type one of the following:
Type
1 to make the backspace key scroll up a page in the current window. Shift-Backspace will scroll down. This is essentially the opposite hitting the space bar, which will scroll down a page and Shift-space will scroll up a page.Type
2 to make the backspace key do nothing. Except delete when text is selected, of course.Type
0 to change back to the default behaviour of going back a page. Note that Command-Left and Right also do this, as well as Command-[ and ].