12 tips for iTunes 10
iTunes 10 has been released, and with it we get some great new features and some interesting user interface changes. Here is a collection of tips and tricks to help you get the most out of what’s new.
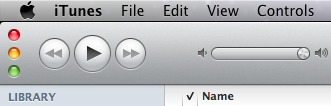
Make the Close, Minimize and Zoom buttons horizontal
Apple’s decision to rotate the red, yellow and green control buttons to save space has caused a bit of an outrage. If you prefer the way the old style looked, you can change it back using a Terminal command. Just open up Terminal (located in Applications/Utilities), paste in the following line and press Return.
defaults write com.apple.iTunes full-window -1
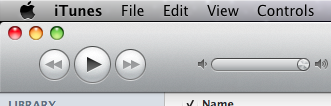
Now just quit and reopen iTunes, and the buttons should be back to their horizontal orientation. If you decide you want the new vertical style back, just use the following line in the Terminal instead.
defaults write com.apple.iTunes full-window -0
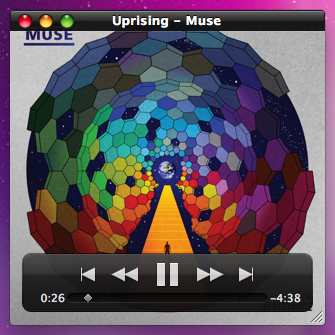
The Artwork player
If you like the iTunes miniplayer (press the green button) then you’ll want to try out the new artwork player. First make sure you have the album artwork displayed by clicking the fourth from left button on the bottom bar. Then, while a song is playing, click on the artwork to bring up the artwork player. When you hover over the artwork, the name of the song and some playback controls will appear. Now you can just close the main iTunes window and use this window to control your music.
Change the new icon
If you can’t bear to part with the old iTunes icon, don’t worry, it’s really easy to change back. First, download the old iTunes.icns file. Then find iTunes in your Applications folder, right-click on it and choose “Show Package Contents.” Find the Resources folder inside the Contents folder, and then drag the iTunes.icns file here. This will replace the new iTunes.icns file, so you might want to create a backup of it in case you ever want to change back.
There are also a load of alternative iTunes icons available on the internet (This one is good). Generally these won’t be available as icns files, but you can still use them as your iTunes icon. Find the image you want to use, right-click on it and choose “Copy.” Then select iTunes in your Applications folder and choose “Get Info” from the File menu. Finally, just click on the icon in the Info window and press Command-V or choose “Paste” from the Edit menu. If this doesn’t work right away, you may need to change your permissions to “Read & Write” at the bottom of the Get Info window first.
Alternatives to broken Automator workflows
Unfortunately there seems to be a bug in the new iTunes that breaks Automator workflows that involve iTunes. Old workflows won’t load, and if you go to create a new one you will find that the iTunes actions are missing. Hopefully this bug will be fixed soon, but for now you can get most of the same functionality using AppleScript. Check out the brilliant Doug’s AppleScripts for iTunes site for AppleScripts that do the same tasks as your Automator workflows.
Creating ringtones
If you were one of the few people who loved paying 99¢ to turn a song you already own into a ringtone, you will be disappointed that this functionality is gone from iTunes 10. Fortunately, you can still do it for free using the usual method.
To do this, first find the portion of a song you want to use as a ringtone, and note down the start and end times. Right-click the song and choose “Get Info" and then go to the Options tab. Enter the start and end times here, then click OK. Right-click on the song again, but now choose “Create AAC version." This should create a copy of the song that is only the length that you specified. Delete this new copy, but make sure you click “Keep File.” In the Finder, go to your Music folder and navigate into your iTunes music and find the file you just created. Change the file extension from “m4a" to “m4r,” then double-click it to add it back into iTunes as a ringtone.
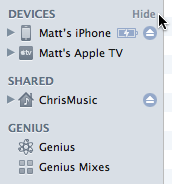
Hiding sections in the sidebar
The disclosure triangles to show and hide the Devices, Genius, Shared and Playlist sections in the sidebar are gone. But if you hover your mouse over one of these titles, a “Show” or “Hide” button appears.
Bring back colours in the sidebar icons
If you hate the lack of colours in iTunes 10, you can do a bit of a hack to bring back some of the old icons. First you will need to find a modified iTunes.rsrc file somewhere on the internet. You can find some here, here, and here, and they all offer slightly different sets of icons.
Once you have found one you like, find iTunes in your Applications folder, right-click on it and choose “Show Package Contents.” Navigate to the Resources folder, and create a backup of the iTunes.rsrc file by dragging it to the Desktop. Then just drag the modified iTunes.rsrc that you downloaded into the Resources folder. You will need to quit and reopen iTunes for the changes to take effect. Just drag your backup file back into the Resources folder from the Desktop if you want to change back to colourless icons.
Remove sidebar icons
If you don’t like the colourless icons or the colourful ones, you can now get rid of them altogether. Just go to iTunes Preferences and un-check “Show source icons” under the General tab. This gives you a tiny bit more horizontal space, and makes the list look a bit cleaner.
![]()
Revert to the old hybrid view
Steve Jobs is very proud of the fact that the new iTunes hybrid view knows not to display the album artwork if you have less than five songs from the album. If you preferred the old system where the artwork was always displayed, just go to the View menu and choose “Always show Artwork.”
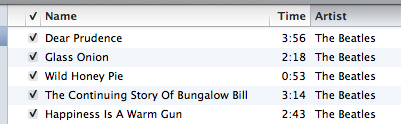
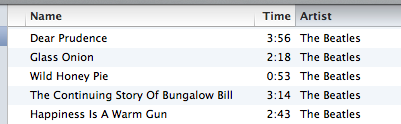
Hide the checkboxes
This is a welcome addition for everyone who doesn’t use the checkboxes that are shown next to every song in list view. In the iTunes Preferences just un-check “Show list checkboxes” under the General tab. Even if you do use the checkboxes (for example to select which songs sync to a iPod), you can still hide them for everyday use, and show them temporarily when you want to change which songs are checked and unchecked.
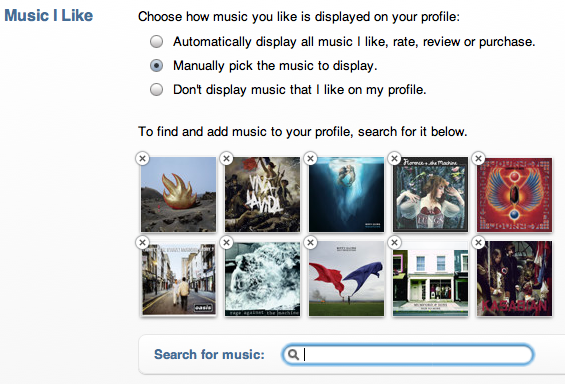
Manually pick “Music I like" on you Ping profile
If you don’t agree with the 10 albums that Ping automatically adds to the “Music I like” section of your profile, you can change them to whatever you want. On your Ping profile click “Edit profile” then scroll down to the “Music I like” section. Here you can click “Manually pick the music to display” and then use the search tool to add your favourite albums.
Share a link to your Ping Profile
If you want to send your friends a link to your Ping Profile, just right-click on your name at the top and choose “Copy link.” You can then paste it into an email, tweet or Facebook message to share it with whoever you want.