How to use Network Utility
Everything you can do in Network Utility you can actually do in a Terminal window using unix tools. But why go to all that effort when Apple have created a nice application that lets you do things much more easily.
When you first open up Network Utility you will see nine tabs along the top [Update: eight in Snow Leopard]. Here's a run through of what you can do in each tab.
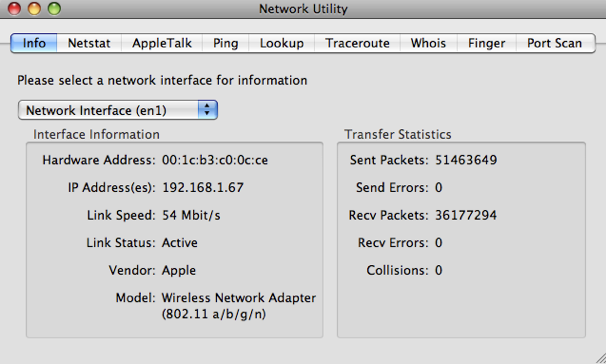
1. Info
The first tab, Info, unsurprisingly gives you general information about your network. The Network Interface drop-down menu shows all the different ways your Mac can connect to the Network. Typically these are ethernet, wireless and Firewire.
The useful bits of information are the Hardware Address and IP Address. You will only have an IP address if that network interface is connected, otherwise it will say unknown. The Hardware Address, otherwise known as a MAC address, can be used to uniquely identify your computer (even though it is possible to change it).
One useful way to use the MAC address is when setting up your wireless router. You can set most routers to only allow specific MAC addresses to join, meaning other people can't log onto your wireless and connect to the internet.
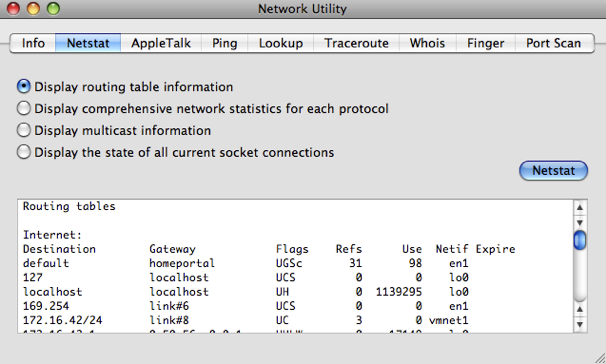
2. Netstat
Netstat is a tool that is really useful to network administrators for troubleshooting, but pretty useless to the average user. If you choose "Display routing table information" and click Netstat, you will get a list that contains all the computers on the network. For example, I get Matts-Macbook, Matts-iPhone and ChrisG5.
If you choose "Display the state of all current socket connections" and click Netstat you'll see a list of your computer's network connections. For example, the first items on the list will correspond to any web pages you have open. If you type the numbers under "Foreign Address" into Safari, the web page will sometimes appear.
3. AppleTalk
The AppleTalk tab is very similar to the Netstat tab, but specifically for Apple's proprietary protocol called AppleTalk. It was very popular in the early days of the Mac, but now has been pretty much abandoned and is unsupported in Snow Leopard. You can read more about AppleTalk on its Wikipedia page. [Update: The AppleTalk tab is completely gone in Snow Leopard]
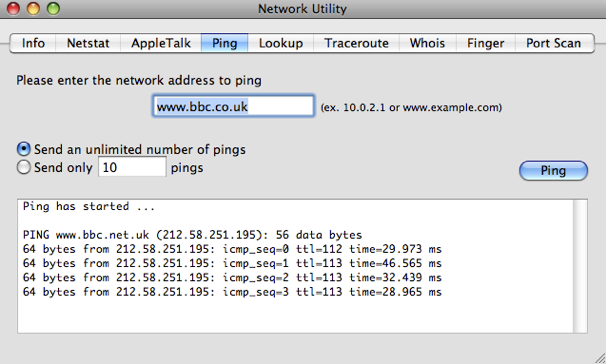
4. Ping
Ping is a tool to check if an internet address is working. When you "ping" an address, you send a small bit of data which it sends back.
You can use this to check if a website is down if it isn't loading in Safari. Alternatively, if you think your internet connection is down, you can try pinging sites that almost never go down like google.com and bbc.co.uk to see if you have a problem on your end.
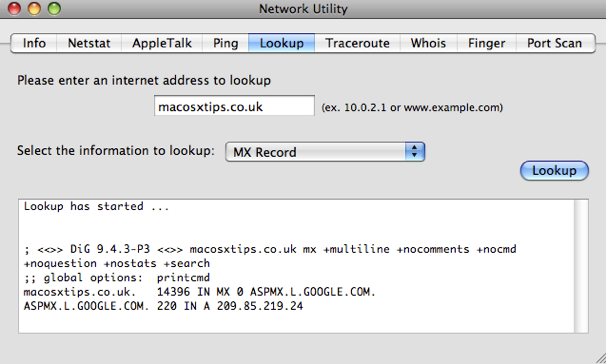
5. Lookup
Lookup allows you to get information about a web site or IP address. The drop-down menu allows you to choose from a number of different types of information. For example, performing a Name Server lookup on macosxtips.co.uk will tell you that this site is hosted by Dreamhost, and a MX record lookup will tell you that our email is handled by Google.
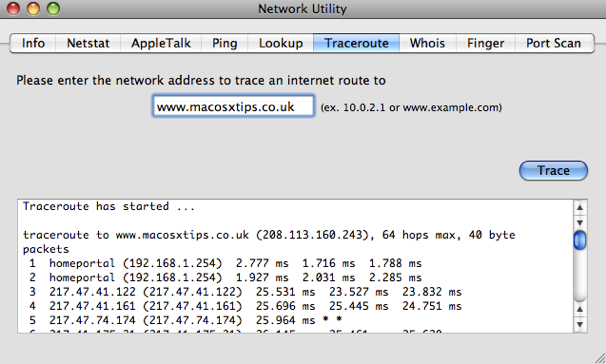
6. Traceroute
When you enter an address and click Trace, traceroute will show you the route taken by data sent between you and the server. It allows you to see all the servers that your data goes through along the way.
You can use this to troubleshoot connection problems by finding out the point where your data is being blocked.
You can also use it when you are downloading a file and have multiple download mirrors in different locations to choose from. Just type the addresses of the mirrors into traceroute and you can get a good idea of which mirror is fastest.
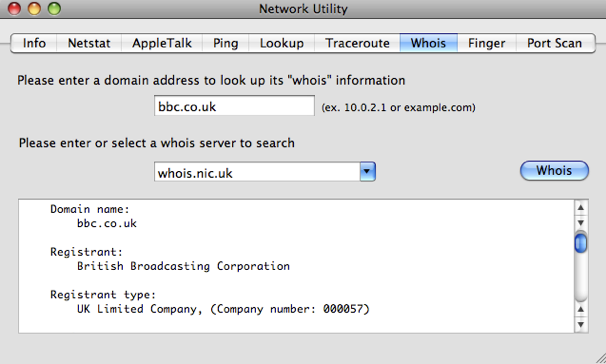
7. Whois
The Whois database gives you information about internet addresses and who has registered them. The default whois server whois.internic.net works quite well for most addresses, but you might have to type "domain apple.com" for example to get it to work. For .co.uk addresses use "whois.nic.uk" as the whois server. You will get information like the registrant, their address, who they registered with, when their registration was started and and when it expires.
8. Finger
Finger, created in 1971, is one of the earliest forms of status updates that are now done using Facebook and Twitter. It's hardly used anymore, but you can use finger to check if your friends are online, and you can post .plan files to your profile similar to blog posts.
One of the best ways to use finger is to type in your username or the username of another user on your Mac. It will tell you if they/you are currently logged in and how long since they/you last logged in.

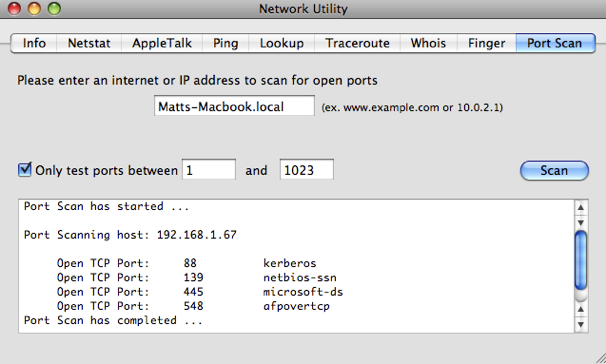
9. Port Scan
The final tab in Network Utility, Port Scan, is for scanning which ports are open at a certain address. These Network ports are a sort of virtual version of the ports on the side of your computer, and each port is for a certain type of network traffic. For example, port 80 is used for web pages.
You can use Port Scan to test your own computer by typing in the name of your Mac followed by ".local". You can find this name in the Sharing section of System Preferences.
Things like iTunes sharing, instant messaging, BitTorrent, AFP and SMB sharing all use different ports. If you find that one of these isn't working, it might be because your firewall is blocking the port that it uses. Instead of turning off your firewall, you can just set it to open that port.
Just run Port Scan with the application or sharing turned off and then again with it turn on to see which port appears. You can then set your firewall to open this port and allow network traffic through. Note that the built in firewall that comes with Mac OS X works on a per application basis rather than a port basis, to keep things simpler for the average user.