Get to grips with Spaces in Lion
The way you interact with Spaces has changed quite a lot in Lion, so here’s a quick guide of all the new features and changes.
Spaces are now accessed through Mission Control
Apple’s naming of Mission Control is very apt — they have managed to merge Spaces, Exposé and Dashboard into one single interface, giving you one simple but powerful way to manage and navigate through all your open windows and applications. If you have a trackpad or magic mouse it can be accessed using gestures (default is swiping up with three fingers) otherwise you can access it through its Dock icon or assign it to a hot corner.
In Mission Control, you’ll find your Spaces listed horizontally along the top. By default you’ll just have two Spaces - Dashboard, and Desktop 1. To add new Desktops, just move your cursor up to the top right hand corner of the screen and click the new semi-transparent desktop that appears.

Switching between Spaces
The most obvious way to switch to another Space is to just click on it in Mission Control, however there are two other methods that are much quicker: Either by swiping with four fingers to the left or right, or alternatively by holding the Control key while pressing the left and right arrows. You can use either of these methods both inside and outside Mission Control.
You can also set custom keyboard shortcuts for each Desktop in the Keyboard section of System Preferences. On the Keyboard Shortcuts tab, look under Mission Control. Each Desktop should have an entry, where you can enable the default (Control-1, Control-2, etc.) or set whatever you want.
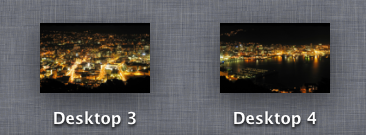
Set a different background for each Desktop
One of Mac OS X’s most requested features is now possible with Lion - setting a different background for each Space. Simply make sure System Preferences is closed, then open it up and change the background while you are in a specific Desktop. The background in Desktop 1 will be the default for new Desktops.
You can go one of two ways with this: The more practical thing to do is to set very different, contrasting backgrounds for each Desktop, making it easy to tell which Desktop you are in from a quick glance. Alternatively, you can use one of these awesome backgrounds that join up edge to edge. These look fantastic when horizontally sliding between Desktops using the four-fingered swipe gesture.
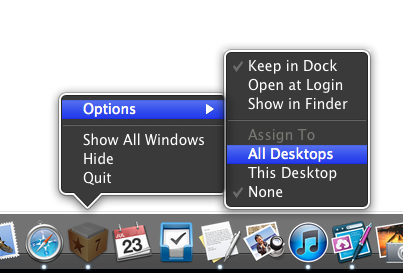
Assign applications to a Desktop
Now that there is no Spaces preference pane in System Preferences, you might think it’s no longer possible to assign applications to a specific Desktop (or all Desktops). Fortunately you can still do this — the settings have just been moved to a new place. You’ll find them by right-clicking on an application’s Dock icon and looking under Options. Here you can assign to All Desktops, This Desktop or the default, None.
Full screen apps get their own Space
Each application you set to appear full screen in Lion will automatically have its own Space created. I find this really useful with applications like iTunes - I want it always running in the background, and I want to be able to access it quickly. As its own Space, it is out of the way, but always quickly accessible with a four-fingered swipe to the left.

Take a quick look at what’s left in System Preferences
While most of the preferences for Spaces are now gone, there are still a few things you can change listed under Mission Control. In particular, you might want to turn off the option to “automatically rearrange spaces based on most recent use”.