Access hidden Preview features through Automator
One topic that came up in the comments of that tip was Preview's inability to scale and resize images. I explained a trick involving zooming and using the Mac OS X Screen shot tools, but this is far from ideal.
If you have Mac OS X 10.4 Tiger, you will find Automator in your Applications folder. It is an application designed to do repetitive and time consuming tasks for you. You simply create a workflow by dragging and dropping "action" blocks, and then you can set it going whenever you want to perform that action. It's great for doing batch tasks like renaming a long list of files or resizing a large group of images.
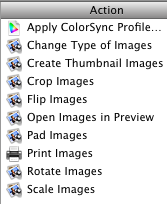
If you look in the left hand column, you will find a section titled Preview. Clicking this will bring up a list of Automator actions that you can use. Some are familiar and accessible from the menus in Preview, but some are new.
Let's start with the simplest possible workflow. Say you want to resize an image (or lots of images) to half its size. To do this, drag the Scale Images action over to the right hand side. A dialog box will appear asking if you want the workflow to keep a copy of the original image or not. If you click Add, the workflow will make a copy of your image on the Desktop and resize that instead of the original. Otherwise, it will simply replace the image with its resized version.
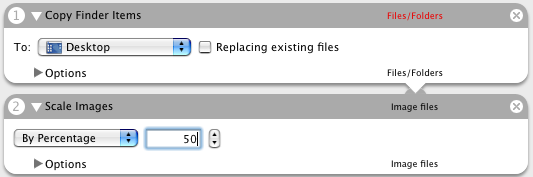
The next step is to choose how you want to scale your image. You can set it to a certain width or a percentage of its original size. Once you have chosen, choose Save As from the File menu and give it a name like Resize Images. From the File Format pop-up menu choose Application. The Desktop is a good place to save it.
![]()
Now we can try it out. Find an image file and drag it onto the Resize Images icon. A copy of the image at half the size should appear on the Desktop - Preview doesn't even need to open. You can even drag a large selection of photos. If you find yourself using

You can even extend your workflows to make them more like applications. For example, try adding "Ask for Finder Items" (from the Finder section) to the start of the work flow. Now, once you have saved the workflow as an application, when you double-click it to open, it will bring up a dialog, asking you to choose the images that you want to resize.
Also, take a look at the PDF actions that Automator has. Some of these are really useful if you often use PDF documents in Preview.
blog comments powered by Disqus