13 things you didn't know about Preview
If a number of images are open in Preview at the same time, you can view a full screen slideshow by choosing Slideshow from the View menu or by pressing Command-Shift-F. Once the Slideshow has started, press I or click the "Index page" button in the toolbar. This make a contact sheet of all the images, with exposé style animation. Shift-click for slow motion as usual.
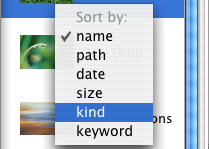
2. Sort Order in Sidebar
Normally images appear in alphabetical order in the sidebar (although PDFs appear in page order) but you can choose a different sort order by right-clicking on one of the thumbnails. This brings up a contextual menu with path, kind, size, date and keyword sort options. For your own custom order, just drag the images up and down.
3. Quickly Trash Images
While viewing an image in Preview, pressing Command-Delete will move it to the Trash, just as if you had selected its icon in the Finder. This is useful if you want to cycle through a collection of photos using the Up and Down arrows, and press Command-Delete to Trash the unwanted ones. You can also drag the thumbnail from the sidebar to the Trash.
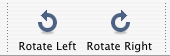
By default, the rotate buttons don't appear in the toolbar when viewing PDFs. To add them, Command-Option-click the Show/Hide toolbar button to bring up the Customise toolbar options. When you click rotate, it will rotate every page in the PDF document. If you Option-Click rotate, only the page you are currently viewing will be rotated.
5. Open a Folder of Images
Dragging a folder onto Preview's icon will cause it to open up every image in the folder. You will have to hold Command-Option while dragging onto the icon to force Preview to accept it. Be careful when doing this with a folder with lots of images in. If you do this with your Pictures folder for example, it will open your entire iPhoto Library. If you are adventurous, have a go at doing this with an application (they are just disguised folders anyway). Strangely, Preview can "open" itself.
6. Use the Scroll Tool with Images
When viewing PDF files, you can access the scroll tool through the View menu. This allows you to drag the images about with a hand rather than using the scroll bars. Unfortunately, this tool is greyed out when viewing anything but PDFs. To use the scroll tool with other formats, hold the Space bar before dragging an image. Additionally, if you Space-Command-click you will zoom in, and if you Space-Command-Option-click you will zoom out.
7. Slideshows Without the Toolbar
When viewing PDFs fullscreen using the slideshow option in the View menu (Command-Shift-F), the toolbar appears at the bottom whenever you move the mouse. To prevent this, double-click anywhere (but not on the toolbar). Now the toolbar will stay hidden until you next click. You can still get its functionality using keyboard shortcuts: Space will Play/Pause and the Left and Right arrows scroll through pages. Pressing A and F will toggle between actual size and fit to screen.
8. Change Annotation Font Size
The annotate tool is available when viewing PDFs. You can have a red oval or a yellow text box. The text is fixed to the System Font, which is Lucida Grande, size 13. To change the size, type
defaults write com.apple.Preview NSSystemFontSize -int 9 into the Terminal (in Applications/Utilities) and press return. The number at the end is the font size (replace with 13 to return to normal). You will need to quit and reopen Preview for changes to take effect.When you click on the PDF in the Spotlight results, it opens up in Preview with the search term highlighted throughout the document. This is pretty useful, however the PDF is actually zoomed in 280 percent. This means you can read the word you searched for pretty easily, but you can't see anything else. To reduce this, start by quitting Preview if it is running and open up Terminal from the Utilities folder in the Applications folder. Type defaults write com.apple.Preview Preview -dict-add PVPDFSpotlightSelectionSize 10 and press return. The 10 at the end corresponds to a 100% zoom level. To return to normal, replace this with 28 (280% zoom). More information here.
10. Image Correction Tools
Preview offers a lightweight alternative to iPhoto's image correction tools. This is accessible from the Tools menu, and offers almost everything iPhoto does. Be warned through, there is no undo option for these changes, so the only way to go back is to revert to the last saved copy.
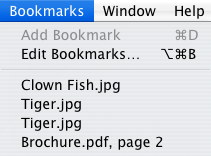
11. Bookmark Images and PDF pages
This feature was originally designed for long PDF files. If you want to save a certain page for reference or are half way through a long ebook and want a break, you can bookmark the page by pressing Command-D or by choosing Add Bookmark from the Bookmarks menu. Interestingly you can also bookmark images that you use often so you don't need to locate them first.
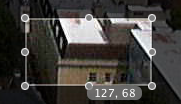
If you hold the Option key before dragging a selection, a small grey box will appear, telling the size of the selection in pixels. More information here.
13. Tag Images
In Preview you can tag images with keywords that are recognised by Photoshop and Spotlight. To do this, press Command-I and click on the Keywords tab. This "Document Info" window acts like an inspector palette, so you can easily scroll through your images without having to open it again.